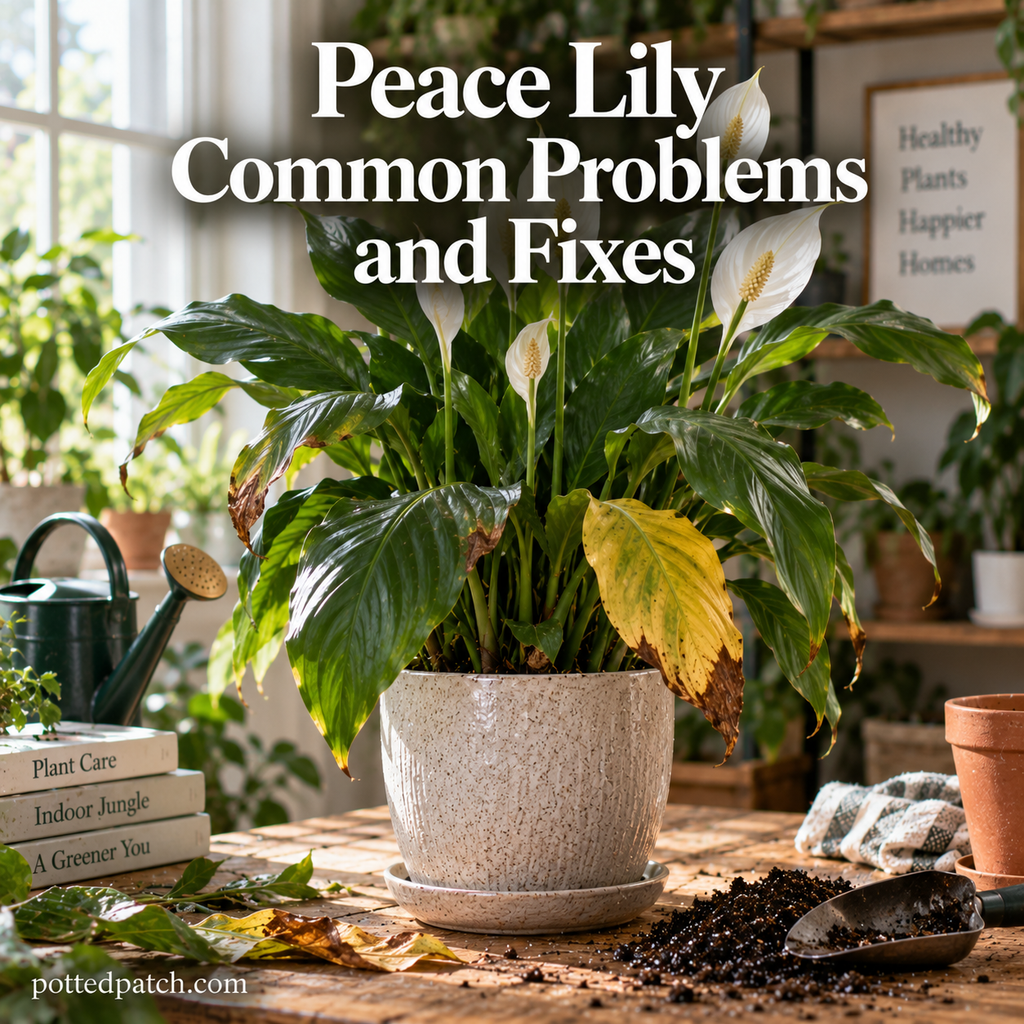

Peace lilies are expressive plants: changes in leaf position, new growth, and soil drying time can tell you a lot about whether their care is working. This guide focuses on the practical decisions that matter most indoors—light, watering, drainage, soil, pot size, feeding, pruning, and knowing when the roots actually need more room.
Peace Lily Indoor Care Basics
A healthy peace lily doesn’t need constant attention, but it does respond best to fairly consistent conditions.
A good indoor setup looks like this:
- Light: Bright, indirect light
- Water: Water according to soil moisture rather than the calendar
- Soil: Moisture-retentive but airy and well-draining
- Container: A correctly sized pot with drainage
- Humidity: Average to moderately humid household conditions
- Temperature: Warm and reasonably stable
- Fertilizer: Moderate feeding during active growth
- Pruning: Remove spent flowers and fully declining foliage
- Repotting: When the root system or condition of the soil actually warrants it
One thing I’d avoid with peace lilies is reacting to every droop by immediately reaching for the watering can. A peace lily can droop because it’s dry, but unhealthy roots sitting in wet soil can also leave the foliage limp.
Check the soil first. That one habit prevents a surprising number of care mistakes.
For broader principles that apply across your collection, see the Complete Indoor Plant Care Guide (Beginner to Advanced).
Best Light for a Peace Lily
Peace lilies are commonly sold as “low-light plants.” It’s more accurate to say they tolerate lower light.
There’s an important difference.
A peace lily may remain green in a dim corner but grow slowly and produce few flowers. Brighter indirect light generally gives you stronger growth and better flowering potential without exposing the leaves to harsh sun.
I would judge a location by more than whether the plant survives there.
Watch for:
- the size and frequency of new leaves;
- whether the plant produces flowers;
- how quickly the potting mix dries;
- whether growth leans heavily toward the light; and
- whether exposed leaves develop pale or scorched areas.
Light also affects watering. Move a peace lily from a bright location into a darker room and the soil may suddenly take much longer to dry.
If you keep watering at the old frequency, a lighting change can quietly become a root problem.
Where to Place a Peace Lily Indoors
Rather than relying only on window direction, look at the actual light reaching the plant.
A window shaded by a porch, trees, or another building behaves very differently from an unobstructed window facing strong afternoon sun.
Bathrooms are another good example. Higher humidity sounds ideal, but a dark bathroom isn’t automatically a good Peace Lily location. The plant still needs useful light.
The room-by-room guide to placing indoor plants can help when choosing between bedrooms, bathrooms, living rooms, offices, and different window exposures.
How to Water a Peace Lily
Peace lilies like more consistent moisture than many drought-tolerant houseplants, but I still wouldn’t put one on a rigid “water every seven days” schedule.
Check the soil instead.
When the upper portion begins drying, check a little deeper before deciding to water. You don’t want to repeatedly let the entire root ball become severely dry, but neither should the pot remain saturated indefinitely.
When watering:
- Water slowly across the surface of the soil.
- Thoroughly moisten the root ball.
- Continue until excess water drains from the bottom.
- Let the container finish draining.
- Empty water collected in the saucer or outer decorative pot.
Then wait until the soil is ready again.
Don’t Use Drooping as Your Only Watering Signal
Peace lilies are famous for collapsing dramatically when they become thirsty.
A dry, drooping peace lily may begin recovering after a thorough watering. But I’d rather catch the plant before it reaches that extreme every time.
Repeated severe drying can eventually produce brown edges and stressed foliage.
More importantly, drooping doesn’t prove that the plant is dry.
If the leaves are hanging but the soil is already wet, don’t add more water. Investigate the situation instead.
The dedicated Peace Lily problems and fixes guide walks through drooping, yellow leaves, brown tips, root rot, and other symptoms in detail.
Drainage for a Peace Lily
Drainage isn’t just about having a hole in the bottom of the pot.
Think of it as the entire root-zone system:
soil + pot size + drainage holes + watering + light + temperature.
You can have drainage holes and still end up with soil that remains saturated for far too long.
Likewise, an airy mix in a correctly sized nursery pot can become waterlogged if that nursery pot sits in an outer container containing an inch of forgotten drainage water.
After watering, check that water actually leaves the root zone.
If the soil routinely stays very wet for much longer than expected, investigate why instead of merely stretching the watering schedule further and further apart.
Possible causes include:
- dense or compacted soil;
- a pot that’s too large;
- poor drainage;
- low light;
- cooler seasonal conditions; or
- watering again before the previous moisture has been used.
Changes in drying time are useful information. If the same pot suddenly takes much longer to dry than it used to, something in the growing environment has changed.
Best Soil for a Peace Lily
The goal isn’t the fastest-draining soil possible.
Peace lilies appreciate some moisture retention. What you want is a mix that becomes evenly moist when watered but still contains enough air space for healthy roots.
A regular indoor potting mix can make a useful base. If it’s dense, materials such as perlite, pumice, or fine orchid bark can improve its structure.
A practical starting mix is:
- 2 parts indoor potting mix
- 1 part perlite or pumice
- 1 part fine orchid bark
Don’t become too attached to the recipe.
Watch how it performs in your home.
If water sits on the surface, the mix feels dense, and the middle of the pot remains saturated for a long time, you need more aeration or a change elsewhere in the setup.
If the entire pot becomes dry almost immediately, look at root crowding, pot size, and how much moisture the mix can retain.
Soil should solve a practical problem, not simply match a formula.
Choosing Containers for a Peace Lily
For routine indoor growing, I strongly favor a container with drainage holes.
Plastic nursery pots are perfectly functional. Glazed or unglazed pots can also work when they drain appropriately.
If you prefer a decorative pot without drainage, use it as a cachepot rather than planting the peace lily directly into it.
Keep the plant in a removable nursery pot, take it out for watering, let it drain, and then return it to the decorative container.
Before putting it back, check the bottom of the cachepot.
Standing water hidden beneath a nursery pot is an easy problem to miss because everything looks dry and tidy from above.
Choosing the Right Pot Size
Bigger isn’t automatically better.
When a small root system is surrounded by a large volume of fresh soil, all that unused mix can remain wet longer than the roots can comfortably use it.
When repotting, move up gradually rather than jumping several sizes.
I would choose the pot based on the root ball, not the size of the foliage above it.
A large, leafy peace lily can still have a root system that doesn’t belong in an enormous planter.
Preventing a Peace Lily From Becoming Severely Root-Bound
Peace lilies can tolerate being somewhat snug, but “likes being root-bound” is often taken too far.
You don’t need to repot the moment a root appears at a drainage hole. At the same time, don’t wait until the container is almost entirely roots and the plant can’t hold enough moisture to get through a normal watering cycle.
Look for several clues together:
- extensive roots emerging from drainage holes;
- a densely packed root ball;
- water running through unusually quickly;
- soil drying substantially faster than it used to; and
- reduced growth despite otherwise appropriate conditions.
The change in watering behavior is particularly useful.
If a mature peace lily that once held moisture comfortably suddenly becomes dry again very quickly, root crowding is worth checking.
How to Repot a Peace Lily
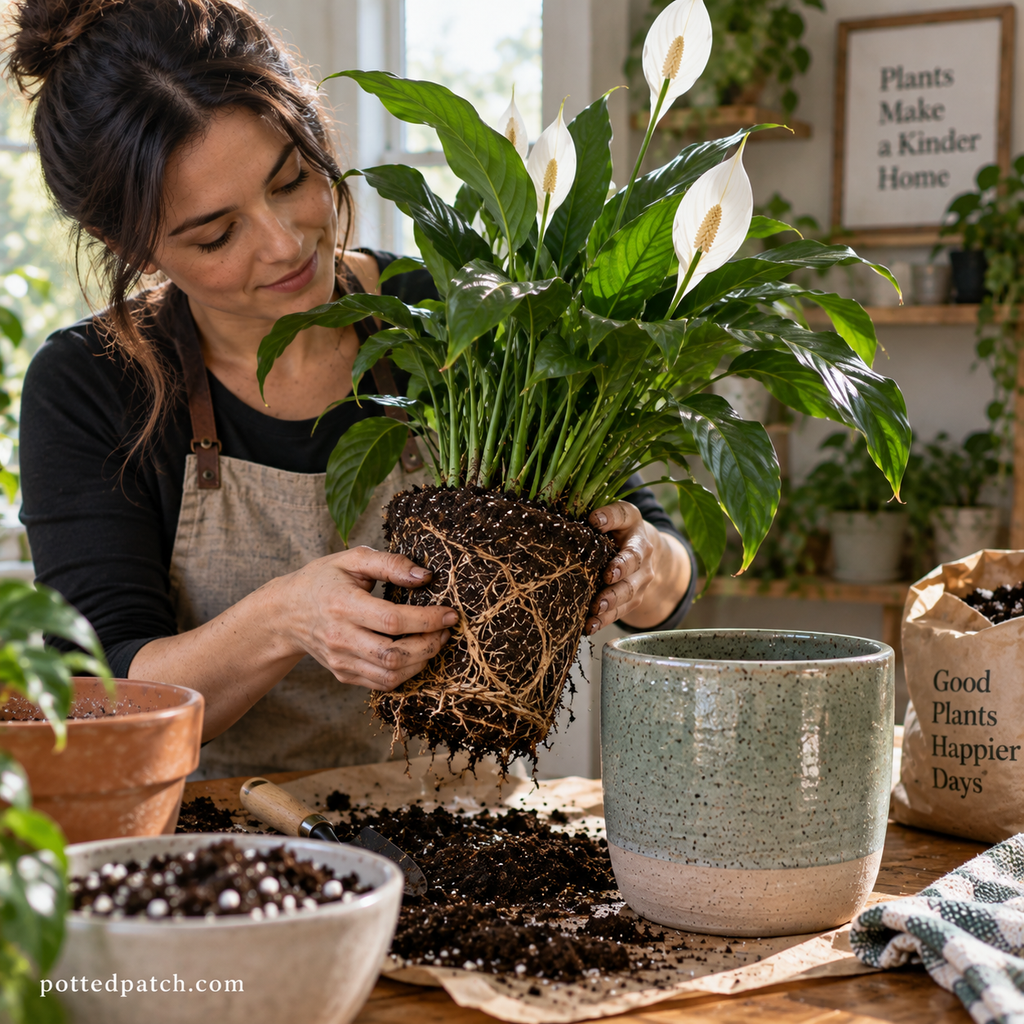
Repot because you’ve identified a reason—not simply because another spring has arrived.
Good reasons include severe root crowding, deteriorated soil, poor drainage, or a container that’s no longer appropriate for the root system.
To repot:
- Prepare a slightly larger container with drainage.
- Remove the peace lily carefully.
- Inspect the root ball.
- Gently loosen heavily circling roots when necessary.
- Remove clearly dead or rotten roots with clean tools.
- Add fresh potting mix to the new container.
- Position the plant at roughly its previous depth.
- Fill around the roots without compressing the soil tightly.
- Water thoroughly and allow it to drain.
Some drooping after root disturbance isn’t unusual.
This is when patience matters.
If you’ve just repotted the plant, avoid immediately responding to temporary drooping by moving it again, fertilizing heavily, repeatedly watering it, and making several other changes.
Give it stable conditions and watch what happens next.
How to Encourage New Growth
When I evaluate a peace lily’s growth, I pay more attention to the newest leaves than to old cosmetic damage.
An old brown edge isn’t going to turn green again. A new leaf emerging at a healthy size and color tells you much more about whether the plant’s current conditions are working.
If new growth has slowed considerably, check the fundamentals in this order:
Check the Light
A peace lily can survive in lower light while barely growing.
Before adding fertilizer, make sure the plant receives useful indirect light.
Check the Root Zone
Persistently wet soil, severe root crowding, or unhealthy roots can all interfere with growth.
Don’t try to fertilize your way around a root problem.
Consider the Season
Growth isn’t equally fast all year.
A plant slowing during darker winter months is different from one that stops growing during a bright period while simultaneously yellowing and declining.
Feed Appropriately
Once light, roots, moisture, and temperature are reasonable, moderate feeding can support active growth.
Healthy new foliage is the result you’re looking for—not artificially fast growth.
How to Fertilize a Peace Lily
Peace lilies don’t need aggressive feeding.
During active growth, use an appropriate houseplant fertilizer according to its label. Reduce or pause feeding when the plant’s growth slows significantly.
I’d be particularly cautious about responding to poor growth with more fertilizer.
If the plant is sitting in dim light, has unhealthy roots, or is already stressed, extra fertilizer doesn’t correct the underlying limitation. It can add another source of stress to the root zone.
The same applies to flowering.
If a healthy peace lily refuses to bloom, light is one of the first things to investigate. A plant sitting in a dim corner isn’t necessarily going to flower because you dramatically increase its fertilizer.
Improve the growing conditions first.
How to Prune a Peace Lily
Peace Lily pruning is mostly cleanup rather than shaping.
Remove:
- completely yellow or brown leaves;
- badly damaged foliage when appropriate; and
- spent flower stalks.
Use clean scissors or pruning shears and follow the leaf or flower stalk down toward the base before cutting it.
Don’t remove an otherwise healthy leaf because of one small brown tip.
That green tissue is still useful to the plant.
If the tip bothers you cosmetically, it can be trimmed to follow the leaf’s natural shape. Just remember that cutting away the brown tissue doesn’t correct whatever caused it.
Repeated brown tips or yellowing belong in the Peace Lily troubleshooting guide, where you can diagnose the pattern rather than treating the appearance alone.
How and Why to Rotate a Peace Lily
If most of a peace lily’s light comes from one direction, new growth may gradually orient itself toward the window.
Occasional rotation can keep the plant from becoming heavily one-sided.
I wouldn’t rotate it compulsively every few days. Instead, look at the plant when you perform your regular care check.
If one side is clearly becoming dominant, turn the pot modestly.
Also distinguish between normal phototropism and poor overall light. If the entire plant is stretching aggressively toward a distant window, rotating it only changes which side has to reach for inadequate light.
The better fix may be a brighter location.
Peace Lily Maintenance
Maintenance doesn’t need to become a long list of weekly chores.
A simple routine works better.
When checking for water: inspect the soil rather than automatically watering.
Every few weeks: look underneath the leaves for pests and check whether dust is accumulating.
When leaves become dusty: support each leaf and gently wipe it with a damp cloth. There’s no need to coat the foliage in leaf-shine products.
When a flower finishes: cut the spent stalk near its base.
When foliage ages: remove leaves once they’re fully declining rather than pruning every minor imperfection.
Periodically: check the cachepot or saucer for forgotten standing water and look at the drainage holes for increasing root growth.
That routine also gives you something more valuable than perfectly clean leaves: a baseline for what your healthy plant normally looks like.
Changes become much easier to notice when you already know what’s normal.
Year-Round Peace Lily Care
Indoor conditions change even when the thermostat barely moves.
Spring and Summer
As natural light increases, a peace lily may begin using water more quickly and producing stronger growth.
Check it more frequently, but don’t automatically increase watering just because it’s summer.
This is also the more logical period for moderate feeding and necessary repotting while the plant is actively growing.
Watch the newest leaves and flowers for evidence that the conditions are working.
Fall and Winter
Winter creates a combination that catches many growers out:
the air can become drier while the soil dries more slowly.
Indoor heating may lower humidity at the same time shorter days reduce the plant’s water use.
That means brown edges don’t automatically mean “water more.”
Feel the soil.
During darker months:
- expect longer intervals between some waterings;
- maximize suitable indirect light;
- keep the plant away from heating vents;
- protect it from cold drafts and cold glass;
- reduce feeding as active growth slows; and
- watch for changes in humidity and pest activity.
Don’t carry a July watering schedule unchanged into January.
Common Peace Lily Care Mistakes
Treating “Low Light” as “No Light”
Peace lilies tolerate moderate and lower light, but stronger indirect light usually supports better growth and flowering.
Watering Every Time the Plant Droops
Check the soil first.
Drooping plus dry soil and drooping plus saturated soil require very different responses.
Keeping the Soil Constantly Wet
Consistent moisture doesn’t mean permanent saturation.
The roots still need air.
Letting a Nursery Pot Sit in Drainage Water
Always check the decorative outer pot after watering.
Using an Oversized Container
Choose the next pot for the root system you have, not the huge plant you hope to have later.
Repotting at the First Visible Root
A root reaching a drainage hole is information, not an emergency.
Look at the entire root ball and the plant’s watering behavior.
Trying to Force Growth or Flowers With Fertilizer
Light, root health, moisture, and season can all limit growth. Fertilizer isn’t a substitute for fixing those conditions.
Making Too Many Changes at Once
This is one of the most important habits to break.
When something looks wrong, don’t repot, relocate, fertilize, prune, and change the watering routine on the same afternoon.
Check the evidence first.
For symptoms such as yellow leaves, persistent drooping, black areas, recurring brown tips, root rot, sunburn, or pest damage, work through the Complete Guide to Indoor Plant Problems (Diagnosis & Fixes) or the more specific Peace Lily Common Problems and Fixes.
Then make the most targeted correction you can.
A Practical Peace Lily Care Routine
Peace Lily care becomes much easier when you separate checking the plant from automatically doing something to it.
Check the plant regularly. Water only when the soil is ready. Prune when foliage or flowers are genuinely finished. Repot when the roots need it. Fertilize when the plant is healthy and actively growing.
Most importantly, watch the newest growth.
Old damage records what happened in the past. New leaves show you how the plant is responding to the conditions you’re providing now.
If new growth is healthy, the root zone behaves predictably after watering, and the plant remains stable through seasonal changes, you don’t need to keep adjusting the routine. Consistency is often more useful than another intervention.