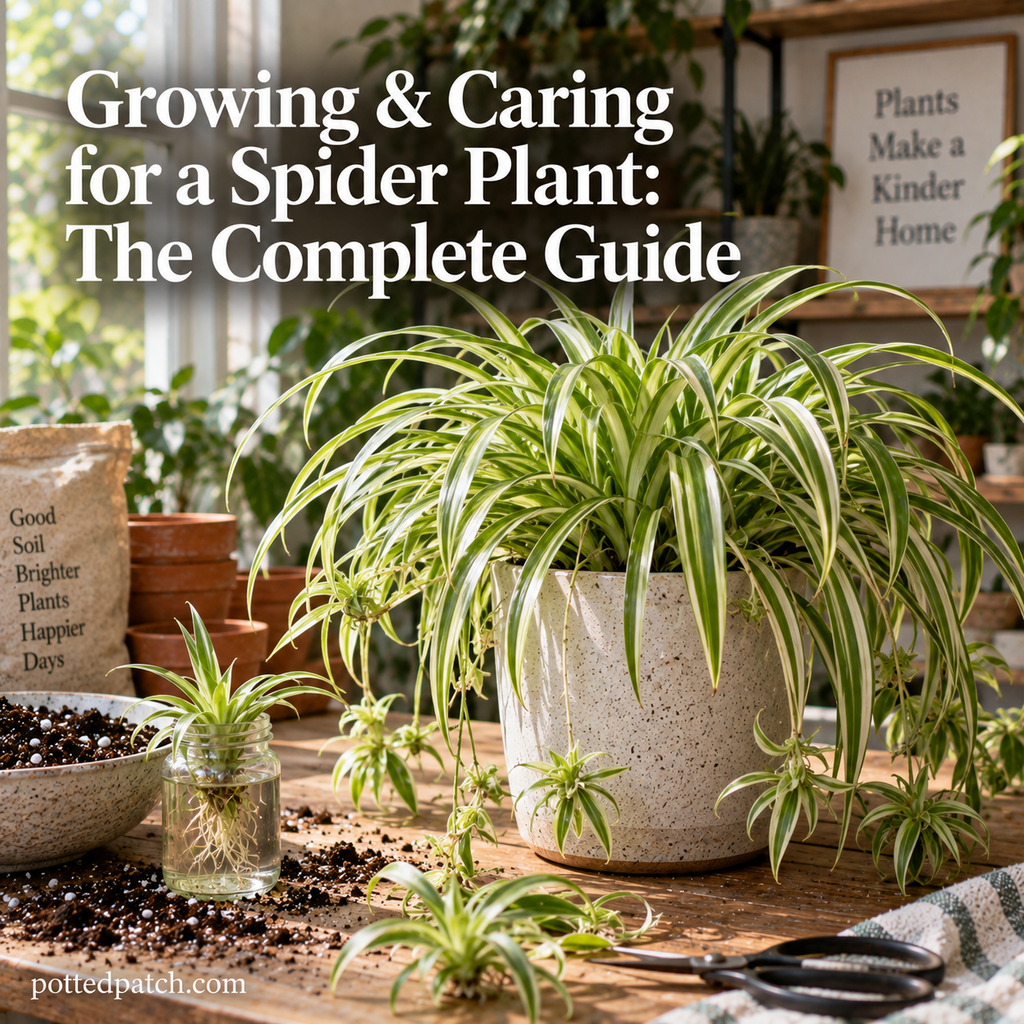
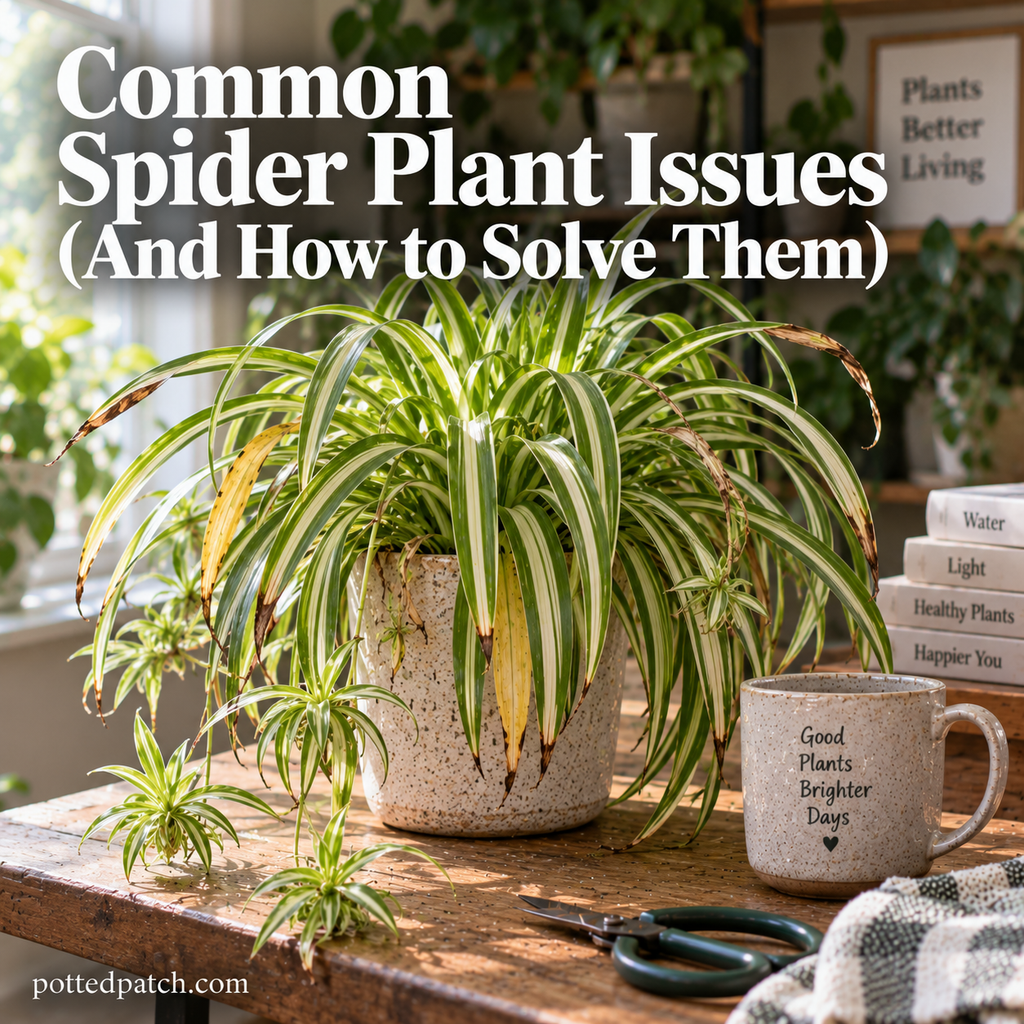
Spider Plant problems are easiest to diagnose by looking at combinations of clues rather than one damaged leaf. I would start with soil moisture, how quickly the pot has been drying, the firmness of the plant’s thick roots and crown, the pattern of damage, and whether healthy new foliage is still developing.
Start With the Whole Spider Plant
Before treating a symptom, inspect the plant.
I would check:
- Is the soil wet, slightly moist, mostly dry, or extremely dry?
- How long has it stayed that way?
- Can excess water leave the container?
- Is the damage affecting old leaves, new leaves, or the whole plant?
- Are the roots firm?
- Has the plant recently been moved or repotted?
- Has its light changed?
- Are pests actually visible?
This prevents one of the easiest troubleshooting mistakes: changing five things because of one bad leaf.
If you water heavily, repot, fertilize, prune, and relocate the plant at the same time, you won’t know which condition caused the original problem—or which change helped.
For normal watering, light, soil, containers, and seasonal care, use the complete Spider Plant care guide.
Brown Tips on Spider Plants
Brown tips are probably the most recognizable Spider Plant problem, but they don’t have one universal cause.
Possible contributors include:
- inconsistent watering;
- prolonged dryness;
- fertilizer accumulation;
- mineral accumulation;
- water quality;
- unusually dry conditions;
- root stress; and
- physical damage.
I wouldn’t blame water quality immediately.
First check whether the plant has been repeatedly drying too far, sitting wet, receiving excessive fertilizer, or experiencing root problems.
Look at the Newest Leaves
Old brown tips won’t turn green again.
That makes new foliage more useful for judging whether a correction worked.
If older leaves remain tipped but new leaves develop cleanly, that’s a better sign than repeatedly trimming old damage.
If brown tips continue appearing on new foliage despite otherwise appropriate care, water quality or mineral accumulation becomes more worth investigating.
Trying rainwater, distilled water, or an appropriate filtered source can be a useful comparison in that situation.
Should You Cut Brown Tips Off?
You can trim them for appearance.
Use clean scissors and follow the narrow shape of the leaf rather than removing a large section of healthy tissue.
But trimming is cosmetic. Recurring new damage still needs diagnosis.
Yellow Leaves on Spider Plants
Yellow leaves are another symptom where soil condition changes the interpretation.
Several Yellow Leaves With Wet Soil
I would investigate the root zone before watering again.
Check:
- drainage;
- how long the soil remains wet;
- whether water collects inside a decorative pot;
- pot size;
- soil structure; and
- root health.
Several yellow leaves combined with persistently wet soil are more concerning than one aging leaf.
Yellow Leaves With Very Dry Soil
The opposite situation can also cause decline.
If the soil has remained extremely dry and the foliage is losing firmness, prolonged dehydration becomes more plausible.
Water thoroughly enough to moisten the root zone, let the excess drain, and then return to a more consistent moisture cycle.
One Older Yellow Leaf
One older basal leaf gradually yellowing while healthy new foliage continues to emerge usually doesn’t justify a complete change in care.
Leaves age.
I pay much more attention to multiple leaves changing together or yellowing spreading into newer growth.
For broader symptom diagnosis, see the Complete Guide to Indoor Plant Problems.
Drooping Spider Plants
First distinguish actual drooping from the plant’s normal shape.
Spider Plant leaves naturally arch outward. Mature foliage isn’t supposed to stand rigidly upright.
What matters is a noticeable loss of firmness compared with the plant’s normal appearance.
Drooping With Dry Soil
If the soil is very dry and the foliage has become unusually limp, the plant may need water.
Water thoroughly and allow excess water to drain.
Then watch whether firmness improves rather than immediately changing several other parts of its care.
Drooping With Wet Soil
This is a different problem.
If the plant is drooping while the soil remains wet, don’t assume another drink will help.
Poor aeration or damaged roots can interfere with normal water uptake even though plenty of moisture is present.
If wet-soil drooping continues—especially with yellowing or soft growth—inspect the roots.
Wilting Spider Plants
I use “wilting” here for a broader loss of firmness across the plant rather than the normal arch of individual leaves.
Again, start with the soil.
Wilted + very dry soil: investigate dehydration.
Wilted + wet soil: investigate drainage and roots.
Wilted after a recent change: consider repotting, heat, relocation, or another abrupt environmental shift.
The important point is that wilted foliage doesn’t automatically mean “add water.”
A plant with damaged roots can look thirsty while sitting in wet soil because the root system isn’t functioning properly.
Leaf Curling on Spider Plants
Curling or folding foliage is another stress signal rather than a diagnosis.
Check soil moisture first.
Curling With Dry Soil
If the potting mix has become extremely dry and the foliage is curling while losing firmness, dehydration becomes a reasonable possibility.
Water the root ball thoroughly and allow it to drain.
Curling With Moist or Wet Soil
Don’t add more water simply because the leaves are curling.
Look at:
- root condition;
- heat;
- recent exposure to stronger sunlight;
- abrupt environmental changes; and
- pests if other clues point in that direction.
If the plant was recently moved, that timing matters.
A sudden change after relocation can tell you more than the symptom by itself.
Soft Stems and Soft Growth
Softness near the crown or base deserves more attention than a dry brown tip.
Healthy Spider Plant crowns and roots should have structure and firmness.
I would investigate promptly if you find:
- soft or mushy tissue near the base;
- yellowing around the same area;
- persistently wet soil;
- an unpleasant smell;
- dark deteriorating roots; or
- foliage detaching from softened tissue.
The combination matters.
A mechanically damaged leaf isn’t the same as soft tissue developing where the foliage meets a wet root zone.
If the base is becoming soft while the soil remains saturated, inspect the roots rather than waiting for the surface to dry.
Root Rot in Spider Plants
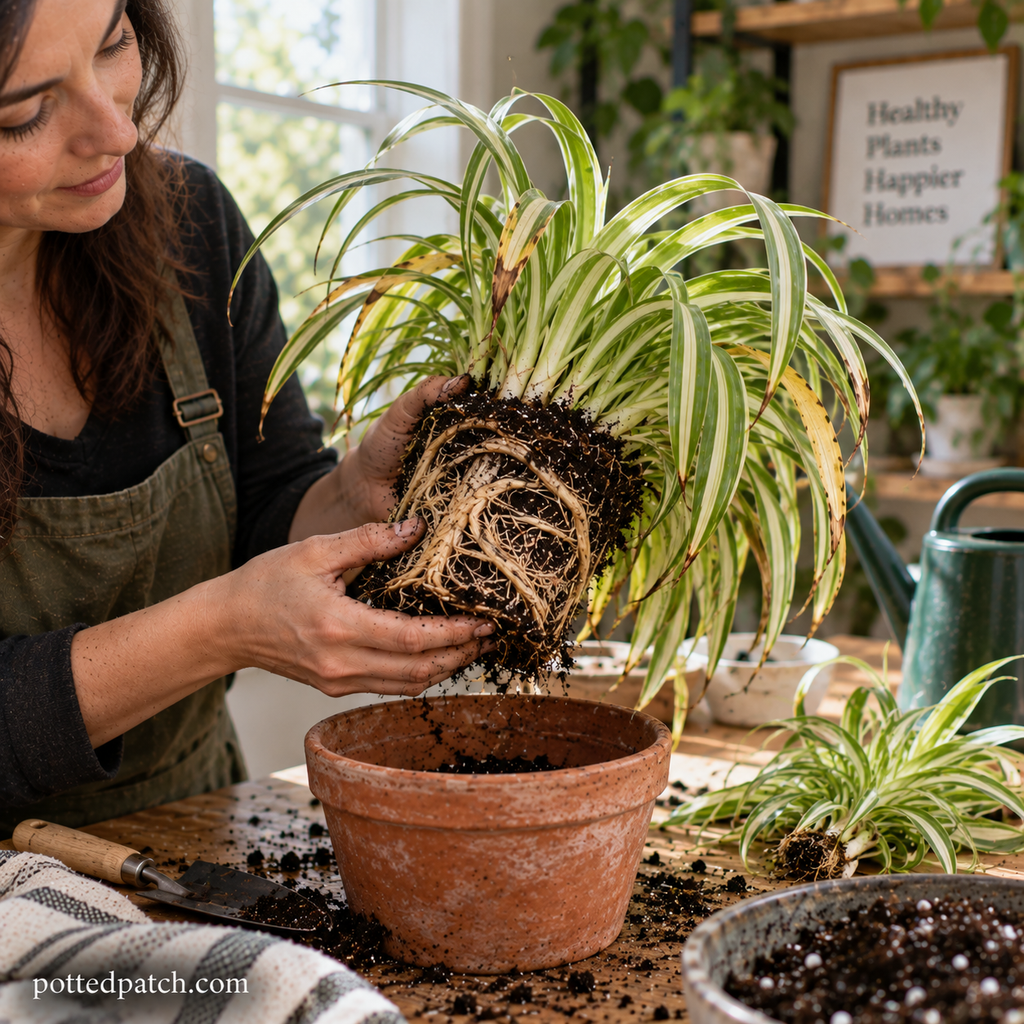
Spider Plants have a useful feature for diagnosing root problems: their mature roots can become thick and fleshy.
Healthy roots should generally feel firm.
Don’t diagnose rot by expecting every root to be perfectly white. Depending on the plant and growing conditions, healthy roots can vary in appearance.
Texture is more informative.
Signs of Root Rot
Look for a combination of:
- persistent wetness;
- yellow leaves;
- drooping despite wet soil;
- soft growth near the crown;
- unpleasant-smelling soil;
- dark deteriorating roots;
- mushy or slimy roots; and
- fragile roots that readily break down.
If the foliage is struggling and the pot has stayed wet unusually long, removing the plant and examining the root system can answer questions that the leaves can’t.
How to Fix Spider Plant Root Rot
If rot is confirmed:
- Remove the Spider Plant from its container.
- Remove enough soil to clearly inspect the roots.
- Identify firm healthy tissue versus soft deteriorating tissue.
- Cut away clearly rotten roots with clean tools.
- Remove severely rotted foliage or crown material if necessary.
- Discard badly degraded wet soil.
- Clean the container or use a clean replacement.
- Repot the healthy remaining plant in fresh, well-draining soil.
- Use a container with drainage holes.
- Correct the condition that kept the root zone excessively wet.
Pay attention to how much healthy root mass remains.
Don’t put a plant that has lost a large portion of its roots into a dramatically oversized container. All that unused soil can stay wet longer than the reduced root system can handle.
Can It Recover?
Recovery depends on how much healthy root and crown tissue remains.
I would judge progress by healthy new foliage and a stable root zone, not by expecting damaged leaves to become perfect again.
Leaf Drop on Spider Plants
Spider Plants don’t shed foliage quite like woody houseplants, so “leaf drop” often means older leaves dying back, damaged foliage detaching, or leaves declining from the crown.
Look at where the affected leaf originates.
One Older Leaf
An older outer leaf dying while healthy new leaves continue emerging from the center may simply be normal turnover.
Several Leaves Declining
If multiple leaves are yellowing, weakening, or detaching, look beyond the individual leaves.
Check:
- soil moisture;
- crown firmness;
- roots;
- drainage;
- recent environmental changes; and
- whether healthy new growth is continuing.
Leaves coming away from soft or rotten tissue near the base deserve much more attention than an old leaf gradually drying.
Damaged leaves also won’t repair themselves. What matters is whether the underlying plant remains healthy.
Slow Growth in Spider Plants
Spider Plants can grow fairly actively when conditions suit them, so a major slowdown is worth putting into context.
I would first ask whether the plant is actually declining or simply growing more slowly.
When Slow Growth May Be Normal
Slower growth is less concerning when:
- days have become shorter;
- indoor conditions are cooler;
- the plant remains firm and healthy;
- roots look healthy;
- soil dries normally; and
- there is no spreading yellowing or damage.
Don’t try to compensate for a seasonal slowdown with extra fertilizer or water.
When Slow Growth Needs Investigation
Slow growth becomes more meaningful when combined with:
- yellowing;
- persistent wetness;
- deteriorating roots;
- weak new leaves;
- pest damage; or
- very low light.
Light is particularly important.
A Spider Plant can tolerate lower light while growing much more slowly. Lower light can also mean slower water use, so the same location can contribute to both reduced growth and soil remaining wet longer.
If placement seems questionable, compare the location using the room-by-room indoor plant placement guide.
Don’t use fertilizer to compensate for inadequate light or unhealthy roots.
Mold on Spider Plant Soil
Surface mold isn’t automatically proof of root rot.
But I wouldn’t ignore recurring mold on a pot that also stays wet for a long time.
Look at why the soil surface is remaining favorable for fungal growth.
Possible contributors include:
- frequent watering;
- slow drying;
- dense soil;
- low light;
- poor drainage;
- an oversized container; and
- dead organic debris on the surface.
How to Fix Mold on Spider Plant Soil
Remove obvious surface mold and dead debris, then correct the moisture conditions allowing it to return.
That might mean:
- waiting until the plant actually needs water;
- improving drainage;
- increasing usable light;
- replacing heavily compacted soil when appropriate; or
- correcting an unnecessarily large pot.
Don’t turn the solution into extreme drought.
Spider Plants aren’t Snake Plants. The goal is a root zone that retains useful moisture but also drains and aerates properly—not soil that is kept permanently dry.
Baseline soil and watering practices are covered in the complete Spider Plant care guide.
Use Symptom Combinations to Diagnose the Plant
Individual symptoms overlap. Combinations narrow the possibilities.
Brown tips + otherwise healthy growth
Review watering consistency, fertilizer accumulation, physical damage, and—if the problem keeps appearing on new leaves—water quality.
Yellow leaves + persistently wet soil
Investigate drainage and roots.
Drooping + extremely dry soil
Dehydration becomes more plausible.
Drooping or wilting + wet soil
Don’t automatically add water; investigate root function.
Soft crown growth + wet soil + deteriorating roots
Rot becomes a much stronger concern.
Slow growth + very low light + slow soil drying
The location may be contributing to more than one problem.
One aging yellow leaf + healthy new center growth
A major intervention probably isn’t justified.
The goal isn’t to match every damaged leaf with a different treatment. It’s to identify the underlying condition that explains the greatest number of clues.
What Recovery Actually Looks Like
Don’t wait for damaged tissue to reverse.
A brown tip won’t become green. A completely yellow leaf won’t return to its original color, and badly damaged tissue won’t rebuild itself.
Instead, look for:
- healthy leaves emerging from the center;
- firm roots;
- no new soft tissue;
- no continued spreading yellowing;
- predictable soil drying;
- stronger growth; and
- eventually, normal mature growth such as healthy runners and spiderettes.
For Spider Plants, new foliage is one of the best records of whether your correction is working.
A Practical Spider Plant Troubleshooting Order
When a Spider Plant starts looking unhealthy, I would work through it in this order:
- Check whether the soil is wet or dry.
- Think about how long it has stayed that way.
- Confirm that excess water can drain.
- Look at whether one leaf or many leaves are affected.
- Check the crown for soft tissue.
- Inspect the thick roots when yellowing, wet-soil drooping, or softness persists.
- Evaluate available light.
- Think about recent changes in location, watering, temperature, or repotting.
- Inspect for pests if the earlier clues don’t explain the damage.
- Correct the most likely underlying issue and wait for the plant’s response.
Avoid changing everything at once.
The best evidence that you’ve solved the problem usually isn’t an old damaged leaf looking better. It’s the plant returning to predictable water use and producing firm, healthy new foliage.