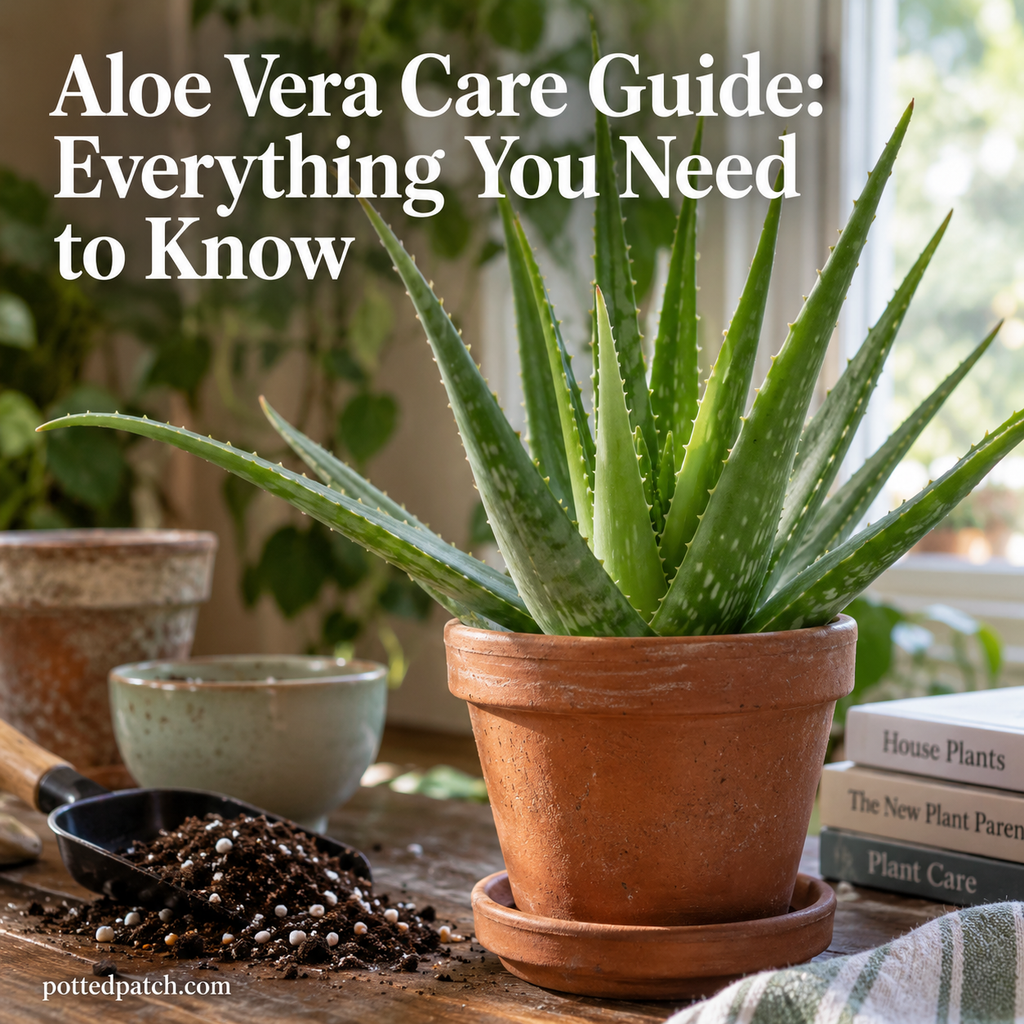
Aloe vera is straightforward to grow indoors once you understand the relationship between strong light, dry-down time, and drainage. This guide covers the care decisions that matter most—from watering and soil to repotting, new growth, seasonal changes, and the mistakes that commonly cause aloe plants to decline.
The most useful lesson I’ve found with aloe is that it generally responds better to being observed than managed on a strict schedule. Check the soil, watch the leaves, and adjust for the season rather than watering simply because another week has passed.
Aloe Vera Indoor Care Basics
Aloe vera is a succulent with thick leaves designed to store water. That adaptation explains much of how it should be treated indoors.
As a practical starting point:
- Light: Very bright natural light, with appropriate direct sun
- Water: Allow the potting mix to dry well between waterings
- Soil: Loose, fast-draining succulent or cactus mix
- Pot: A container with an unobstructed drainage hole
- Temperature: Normal warm household temperatures, protected from frost and cold drafts
- Humidity: Normal household humidity is usually sufficient
- Fertilizer: Light feeding during active growth rather than frequent fertilizing
- Repotting: When roots, pups, soil condition, or plant stability justify it
Aloe’s ability to store water makes it much more forgiving of an occasional missed watering than constantly wet soil.
That distinction is important. A lot of houseplant advice emphasizes keeping plants consistently cared for, but consistency doesn’t mean giving every plant water on the same day each week.
For broader principles that apply across houseplants, see the Complete Indoor Plant Care Guide (Beginner to Advanced).
Light: Give Aloe Vera More Than a Bright-Looking Room
Aloe vera grows best in a genuinely bright location.
Indoors, I would start very close to a bright window rather than several feet back in a room that merely looks well lit. A south- or west-facing exposure can work well, although trees, buildings, window treatments, and seasonal sun angles can completely change the amount of light that actually reaches the plant.
Aloe receiving enough light tends to maintain stronger, more compact growth.
An aloe that needs more light may:
- Stretch toward the window
- Develop unusually long or narrow leaves
- Become floppy
- Lose its compact shape
- Grow very slowly
- Look paler than expected
Leaning is particularly useful to watch. If most of the plant is gradually orienting itself toward the window, I take that as a reason to reassess the location rather than simply rotating it forever.
Rotation can make growth more even, but it doesn’t replace adequate light.
Can Aloe Vera Get Too Much Sun?
Yes—especially when the change happens suddenly.
This is where the advice that aloe “likes sun” can become misleading.
An aloe that has spent months indoors shouldn’t necessarily be moved directly into intense outdoor afternoon sun. The leaves may develop bronze, reddish, brown, or scorched areas before the plant has acclimated.
If I move an indoor aloe into substantially stronger sun, I increase its exposure gradually rather than making the change in one day.
The same principle matters when choosing a permanent indoor location. Our Where to Place Indoor Plants (Room-by-Room Guide) explains how window direction and distance from a window can change the light a plant actually receives.
Watering Aloe Vera
If I had to simplify aloe care to one watering rule, it would be this:
Don’t water because the calendar says it’s time. Water because the soil has dried appropriately.
Aloe stores moisture in its leaves and doesn’t need continuously damp potting mix.
Before watering, check below the surface rather than judging only the top half-inch. I want the mix to dry thoroughly before I soak it again.
When it is time to water:
- Water the soil thoroughly.
- Let excess water flow through the drainage hole.
- Allow the pot to finish draining.
- Empty water collected in a saucer or decorative outer pot.
- Wait for the soil to dry before watering again.
This wet-then-dry pattern is much more useful than trying to decide that aloe always needs water every 10, 14, or 30 days.
Why I Don’t Use a Fixed Aloe Watering Schedule
Drying time changes with the environment.
An aloe in a small terracotta pot beside a sunny window may dry much faster than one in a larger glazed pot receiving weaker light.
Other variables include:
- Season
- Temperature
- Pot size
- Pot material
- Soil composition
- Root density
- Air circulation
This becomes especially noticeable between summer and winter.
In brighter, warmer conditions, I check the soil more frequently because it may dry sooner. During darker winter conditions, I become more conservative because the same pot can remain damp substantially longer.
That’s why I use soil condition as the trigger for watering, not the number of days since the last watering.
Overwatered vs. Underwatered Aloe
Overwatered aloe may develop:
- Soft or mushy leaves
- Yellowing
- Translucent-looking tissue
- Darkening near the base
- Collapsing leaves
- Persistently wet soil
- An unpleasant smell from the pot
An underwatered aloe may develop:
- Thinner leaves
- Wrinkling
- Curling
- Dry tips
- Less-firm foliage
- Extremely dry soil pulling from the pot edges
Here’s the important part: don’t diagnose from the leaves alone.
If an aloe looks dehydrated while its soil is still wet, adding more water may make the real problem worse. Damaged roots can prevent a plant from taking up moisture even when plenty of water is present.
Whenever symptoms don’t match the obvious explanation, work through the Complete Guide to Indoor Plant Problems (Diagnosis & Fixes) before making several changes at once.
Soil: Drainage Matters More Than a Complicated Recipe
Aloe vera needs a potting mix that drains readily and maintains air around its roots.
For most indoor growers, a commercial cactus or succulent mix is a practical starting point.
What matters more to me than having a complicated homemade recipe is how the mix actually behaves after watering.
Pay attention to whether:
- Water can move through the pot
- The soil stays saturated for an unusually long time
- The mix becomes dense and compacted
- The soil dries reasonably between waterings
Standard all-purpose potting soil used by itself can sometimes retain more moisture than I want for aloe, particularly when combined with a large pot, weak light, or a nonporous container.
Aloe Vera Needs Drainage
I strongly recommend a pot with a drainage hole.
Good succulent soil can’t compensate indefinitely for water that has nowhere to escape.
If you like a decorative container without drainage, keep the aloe in a separate draining nursery pot. Remove it for watering, let it drain, and then return it to the decorative pot.
That gives you the appearance of the decorative container without forcing the root system to sit in trapped water.
Terracotta is useful because moisture can evaporate through the porous material, but it isn’t mandatory. Plastic and glazed ceramic can also work well if the pot drains and you adjust watering accordingly.
Repotting Aloe Vera
Aloe vera doesn’t need to be repotted every year just because another growing season has passed.
I would repot when there is an actual reason, such as:
- Roots severely crowding the container
- The plant becoming unstable or top-heavy
- Potting mix becoming compacted or draining poorly
- Numerous pups crowding the parent plant
- Root problems requiring inspection
- A damaged or unsuitable container
One mistake worth avoiding is moving aloe into an enormous pot to “give it room.”
A small root system surrounded by a large volume of damp soil can take much longer to dry. I prefer moving up modestly in pot size.
How to Repot Aloe Vera
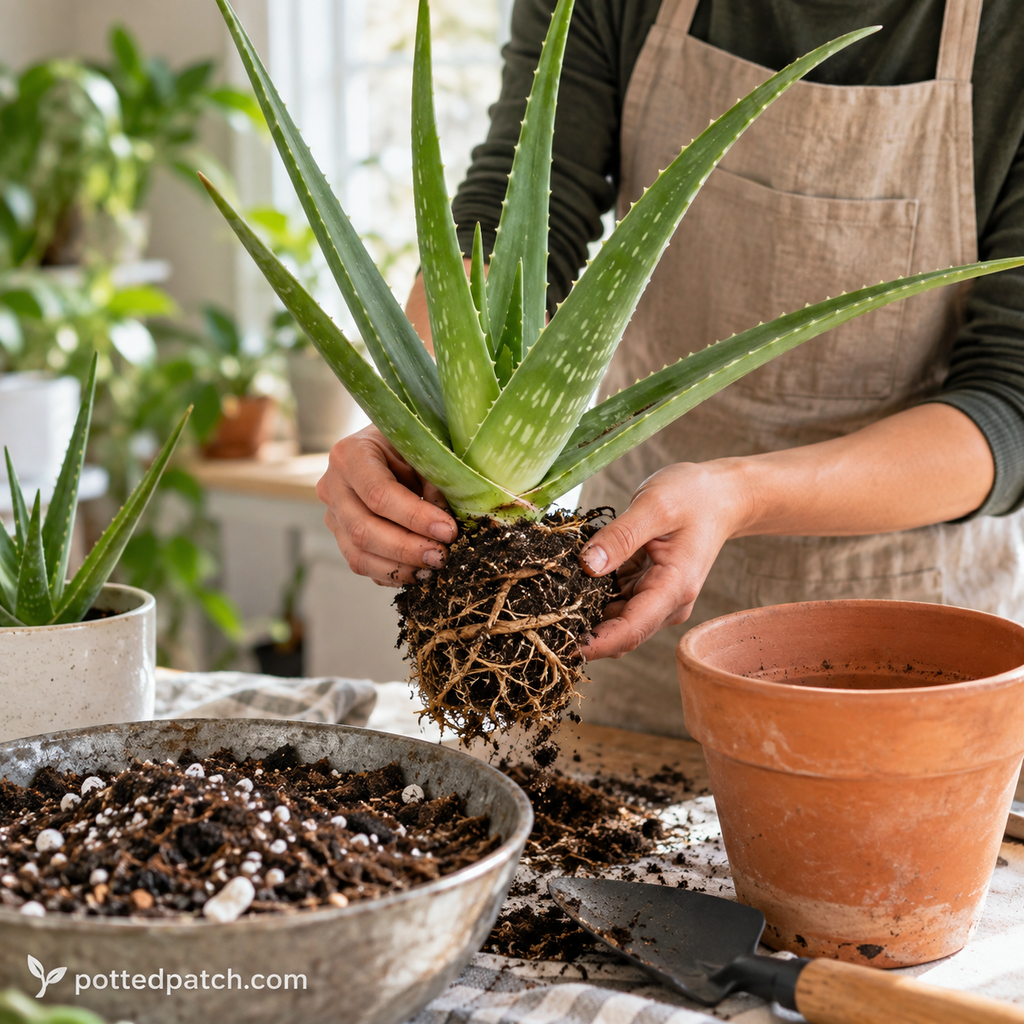
When repotting:
- Choose a slightly larger container with drainage.
- Prepare fresh, fast-draining succulent potting mix.
- Ease the aloe from its old pot without pulling hard on the leaves.
- Remove loose old soil and inspect the roots.
- Trim clearly dead or rotted root tissue with a clean tool if necessary.
- Position the aloe at approximately its previous depth.
- Fill around the roots without burying the leaf bases deeply.
- Give damaged roots time to settle rather than immediately keeping the new mix excessively wet.
Aloe leaves can snap surprisingly easily when bent, so I support the plant near its base rather than using the leaves as handles.
For the broader relationship between container size, drainage, soil structure, and root health, see the Complete Guide to Plant Pots, Soil, and Repotting (Indoor Plants).
Encouraging New Aloe Vera Growth
When aloe isn’t growing, fertilizer is often the first solution people think of.
It isn’t mine.
Before feeding a slow-growing aloe, I check:
- Light
- Season
- Soil moisture
- Drainage
- Root condition
- Available root space
- Recent repotting
An aloe in weak light won’t suddenly produce strong compact growth because it receives more fertilizer. Likewise, a plant with unhealthy roots needs the root problem corrected first.
Healthy new growth is more likely when the plant receives strong light, has a healthy root system, and goes through an appropriate wet-dry watering cycle.
Also account for season.
I’ve learned not to judge winter growth by the same standard as growth during brighter months. If the plant is otherwise firm and healthy, slower growth during darker conditions isn’t automatically a problem.
Aloe Pups Are New Growth Too
Mature aloe plants often produce offsets around their base, commonly called pups.
These can eventually be separated to make new plants.
I wait until a pup is large enough to handle comfortably and preferably has developed some roots of its own. Separating a tiny offset too early makes establishment unnecessarily difficult.
When ready:
- Locate where the pup joins the parent.
- Separate it carefully while preserving its roots.
- Use a clean cutting tool if separation requires a cut.
- Allow damaged tissue to callus when appropriate.
- Pot the pup into a small container with fast-draining mix.
- Avoid keeping the new root zone continuously wet.
A small pot is particularly useful here because a young pup doesn’t need to sit in a large mass of damp soil.
I prefer pups for aloe propagation rather than detached leaves. Aloe leaf cuttings are much less dependable than offsets and can rot before establishing successfully.
Year-Round Aloe Vera Care
Aloe doesn’t need exactly the same care twelve months of the year.
Spring and Summer
As daylight increases, the plant may grow more actively and its pot may dry faster.
During this period I pay closer attention to:
- Faster soil drying
- New growth
- Developing pups
- Whether repotting is necessary
- Stronger sunlight through windows
- Sunburn risk if the plant goes outdoors
This doesn’t mean automatically watering more often. It means checking more often.
If the soil is still damp, the season isn’t a reason to add water.
Fall and Winter
During shorter days, growth may slow and the potting mix can take longer to dry.
This is when I become particularly cautious about watering.
Winter care usually means:
- Checking moisture before watering
- Allowing longer intervals when drying slows
- Keeping the plant close to useful natural light
- Reducing or pausing fertilizer when growth slows
- Protecting it from cold windows and drafts
- Watching for soil that remains wet unexpectedly long
An aloe can look almost unchanged for a while during winter. If its leaves remain firm and the roots are healthy, slower growth alone doesn’t convince me that something needs fixing.
Temperature, Humidity, and Fertilizer
Aloe vera fits normal household conditions fairly well.
Temperatures around 60–80°F (16–27°C) are generally comfortable, but protect the plant from frost, freezing conditions, and sudden cold drafts.
Aloe also doesn’t require the elevated humidity that many tropical foliage plants prefer.
I don’t routinely mist aloe.
Misting doesn’t solve a watering problem at the roots, and maintaining wet foliage isn’t necessary for a plant adapted to relatively dry conditions.
Fertilizer
Aloe is not a heavy feeder.
During active growth, an appropriate fertilizer can be used lightly according to its label. I would rather feed conservatively than try to push rapid growth with repeated fertilizer applications.
Excess fertilizer can contribute to salt buildup and root stress.
If an aloe looks unhealthy, investigate its light, moisture, and roots first. Fertilizer can’t correct root rot or inadequate light.
Common Aloe Vera Care Mistakes
Most aloe problems I’ve encountered or would investigate first come back to a small group of care decisions.
Watering on a Schedule
This is probably the biggest one.
A watering interval that worked during warm, bright weather may be far too frequent when conditions become cooler and darker.
Check the soil instead.
Keeping Aloe Too Far From a Window
Aloe can remain alive in less-than-ideal light for a while, which sometimes hides the problem.
Stretching, leaning, weak growth, and slowly drying soil are clues that the location deserves another look.
Using a Pot Without Drainage
A decorative pot may look perfect while hiding water around the roots.
Use a draining inner container if necessary.
Moving an Indoor Aloe Straight Into Strong Outdoor Sun
Aloe likes bright conditions, but acclimation still matters.
Increase direct exposure gradually.
Using an Oversized Pot
Bigger isn’t automatically better.
Excess soil around a small root system can remain wet longer than expected.
Misting Aloe Like a Tropical Plant
Aloe doesn’t need routine misting or unusually high humidity.
Fertilizing a Struggling Plant Before Diagnosing It
If the plant is yellow, soft, or declining, first determine whether the roots, moisture, and light are appropriate.
Assuming Brown Leaves Mean “More Water”
This is a particularly risky assumption.
Brown tissue can result from dehydration, sun damage, physical injury, root trouble, or other stress. Always check the soil before adding water.
Reading Aloe Vera’s Leaves
You can learn quite a bit by looking at both the leaf symptoms and the conditions around the plant.
Yellow or Soft Leaves
When yellowing appears alongside soft foliage and wet soil, excess moisture becomes one of the first things I investigate.
Check whether the pot drains and how long the soil has remained damp.
Thin or Wrinkled Leaves
If the leaves become noticeably thinner or wrinkled and the soil is completely dry, the plant may be dehydrated.
But if those same leaves occur while the soil is wet, I would inspect the roots rather than adding more water.
Brown or Bronze Areas
Consider what happened immediately before the discoloration appeared.
Brown or bronze patches after a sudden increase in direct sun suggest a very different problem from browning on an aloe sitting in wet, poorly draining soil.
Leaning or Floppy Growth
First evaluate light.
If the plant consistently leans toward the window, it may need a brighter position. Also check whether the plant has become top-heavy or unstable in its pot.
Should You Remove Damaged Aloe Leaves?
Not every blemished leaf needs to be removed.
If much of a leaf remains firm and healthy, I generally don’t cut it simply because of a cosmetic mark.
Completely dead, badly damaged, or rotting leaves can be removed near the base with a clean cutting tool without damaging healthy surrounding growth.
Pests to Watch For
Aloe vera can still develop houseplant pests.
Inspect around leaf bases and between tightly spaced leaves for:
- Mealybugs
- Scale
- Spider mites
Mealybugs often look like small cottony deposits, while scale can resemble attached brown or tan bumps.
I like to make pest inspection part of routine care rather than waiting for a plant to look severely damaged. The sheltered areas around an aloe’s leaf bases are exactly the places I check closely.
If you find pests, separate the plant from nearby houseplants while you identify and address the problem.
For symptoms that don’t clearly point to an aloe-specific care issue, the Complete Guide to Indoor Plant Problems (Diagnosis & Fixes) provides a broader troubleshooting process.
A Simple Aloe Vera Care Routine
A healthy aloe shouldn’t require constant attention.
My routine would look something like this:
Regularly:
- Check the soil without automatically watering
- Look for stretching, yellowing, or soft leaves
- Inspect the leaf bases for pests
- Check whether the plant is leaning strongly toward its light source
- Rotate when useful for balanced growth
When the soil has dried appropriately:
- Water thoroughly
- Let excess water drain
- Empty the saucer or outer container
- Leave the soil to dry again
Every few months:
- Check whether the plant has become crowded
- Look for developing pups
- Make sure the soil still drains properly
- Reassess the amount of light as the season changes
- Check whether the plant is becoming unstable in its pot
The routine is intentionally simple.
Aloe tends to do better when each care decision has a reason behind it rather than when it receives constant attention.
Frequently Asked Questions About Aloe Vera Care
Is Aloe Vera Easy to Care For?
Yes, once its light and watering are balanced.
A bright position, a draining container, fast-draining soil, and enough time for the root zone to dry between waterings cover most of what aloe needs indoors.
How Often Should I Water Aloe Vera?
There isn’t one universal interval.
Wait until the soil has dried thoroughly, then water deeply and allow the excess to drain. How long that takes will change with the pot, soil, light, temperature, plant size, and season.
Does Aloe Vera Need Direct Sunlight?
Aloe appreciates very bright light and can handle direct sun, but sudden exposure to substantially stronger sunlight can scorch a plant accustomed to indoor conditions.
Acclimate it gradually.
Can Aloe Vera Survive in Low Light?
It may persist for some time, but low light isn’t an ideal long-term setup.
Watch for stretching, leaning, weak growth, and soil that takes increasingly long to dry.
Why Is My Aloe Vera Drooping?
Start with the soil.
If it is extremely dry, dehydration may be involved. If it is wet, don’t automatically add more water—consider root health, drainage, and light. Also check whether the plant has simply become physically unstable or top-heavy.
Should I Mist Aloe Vera?
Usually not.
Aloe doesn’t require high humidity for normal indoor growth, so misting isn’t a necessary part of routine care.
When Should I Repot Aloe Vera?
Repot when the roots are genuinely crowded, the plant becomes unstable, the soil has deteriorated, pups are overcrowding the container, or another pot/root problem needs correcting.
A healthy aloe doesn’t need a new pot just because another year has passed.
Final Thoughts
Aloe vera care becomes much easier when you stop treating watering, light, soil, and the pot as separate subjects.
Strong light supports healthy compact growth and influences how quickly the plant uses moisture. Fast-draining soil and a pot with drainage allow the roots to dry appropriately. Seasonal changes alter how quickly that same setup dries.
That’s why I pay more attention to what the plant and soil are doing today than to a fixed care calendar.
If your aloe has firm leaves, healthy roots, appropriate compact growth, and soil that dries predictably between waterings, there usually isn’t much to fix.
When something changes, use the symptom as a clue. Check the soil, consider the light, think about recent changes, and inspect the roots when necessary before trying several solutions at once.
Aloe vera doesn’t need constant intervention. Once you find the right balance of bright light, careful watering, and good drainage, the best thing you can often do is give it time to grow.