Dracaenas are slow to moderate growers, which means they don’t need frequent repotting. But when the time comes, repotting correctly can dramatically improve growth, prevent root problems, and refresh tired soil.
If your dracaena looks crowded, stressed, or slow-growing, it may be time for a new pot.
This guide explains exactly when to repot a dracaena and how to do it step by step.
How Often Should You Repot a Dracaena?
Most dracaenas need repotting every 1–2 years.
However, frequency depends on:
- Growth rate
- Pot size
- Soil condition
- Indoor environment
Dracaenas actually prefer being slightly snug in their pots. Repot only when necessary — not on a strict schedule.
Signs Your Dracaena Needs Repotting
Look for these clear indicators:
- Roots growing out of drainage holes
- Soil drying out extremely fast
- Water running straight through the pot
- Stunted or slowed growth
- Visible roots circling the soil surface
- Soil compacted or shrinking away from edges
If you notice two or more of these signs, repotting is likely overdue.
Best Time to Repot a Dracaena
The ideal time is spring or early summer.
This is when dracaenas are actively growing and can recover quickly from root disturbance.
Avoid repotting in:
- Late fall
- Winter
During dormancy, plants recover more slowly and may become stressed.
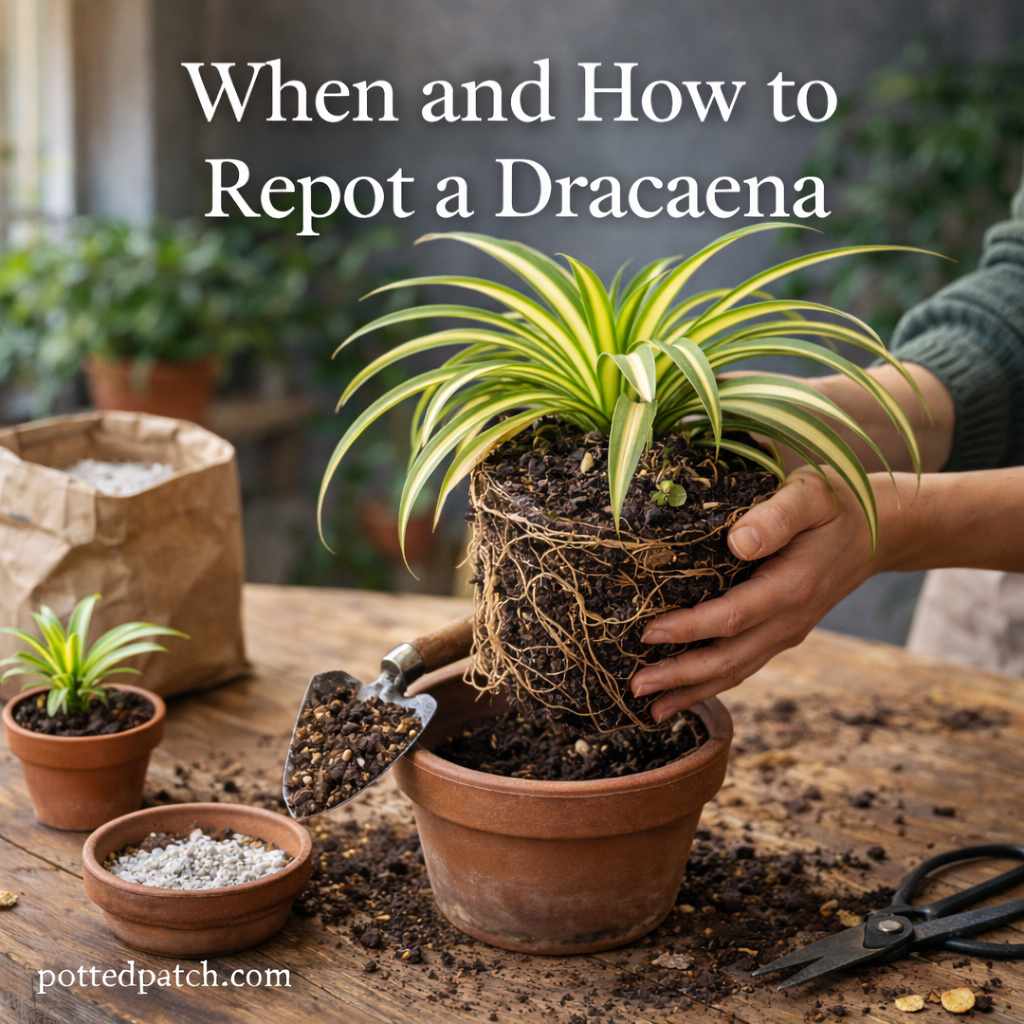
Choosing the Right Pot
When repotting:
- Choose a pot 1–2 inches larger in diameter than the current one.
- Make sure it has drainage holes.
- Avoid dramatically upsizing (too much extra soil holds excess moisture).
A slightly larger container gives roots room to expand without overwhelming the plant.
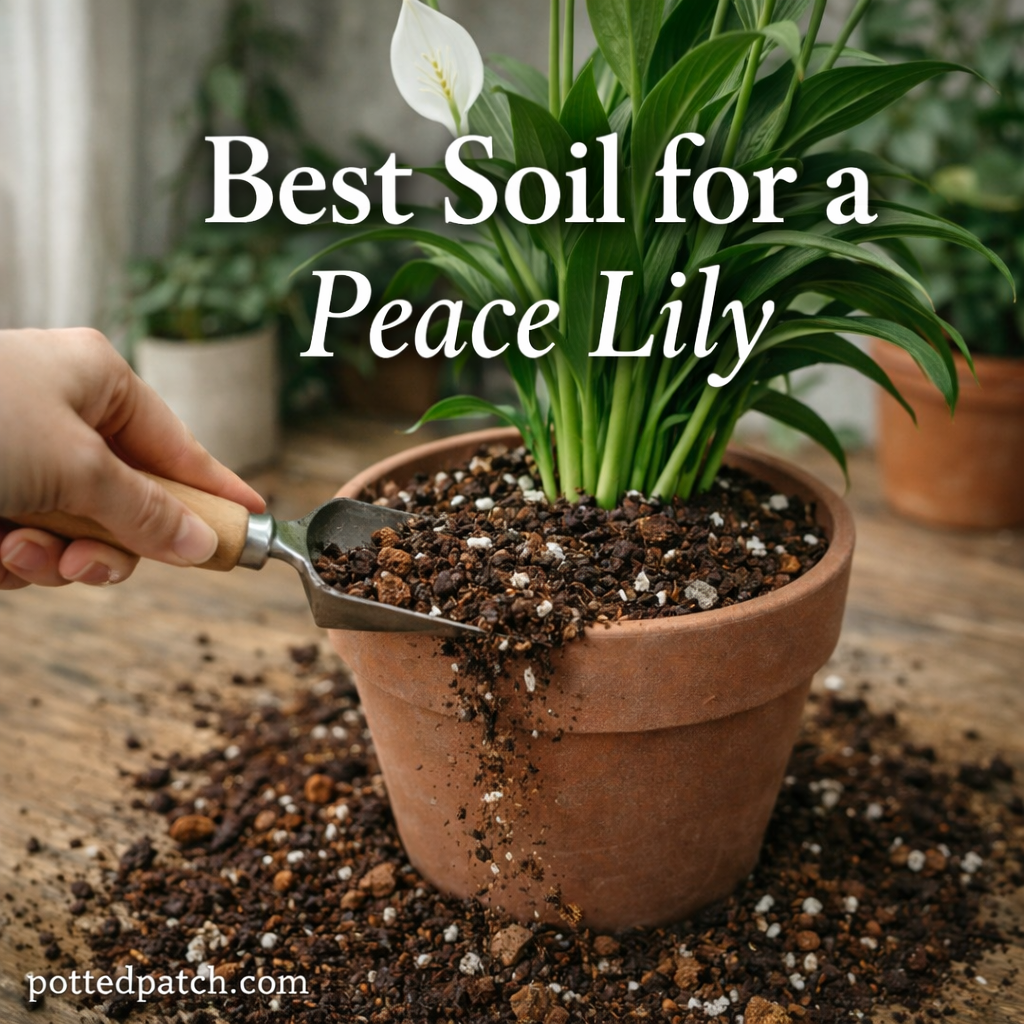
Best Soil for Repotting
Dracaenas prefer:
- Well-draining soil
- Light, airy texture
- Slightly acidic to neutral pH
Simple soil mix:
- 2 parts indoor potting soil
- 1 part perlite
- 1 part orchid bark or coarse sand
This combination prevents compaction and improves airflow around roots.
Step-by-Step: How to Repot a Dracaena
Follow these steps carefully:
Step 1: Water Lightly Before Repotting
Water the plant a day before repotting. Slightly moist soil reduces root stress and makes removal easier.
Step 2: Remove the Plant
Gently tilt the pot sideways and slide the plant out. Tap the bottom if needed.
Avoid pulling on the leaves or stem.
Step 3: Loosen the Roots
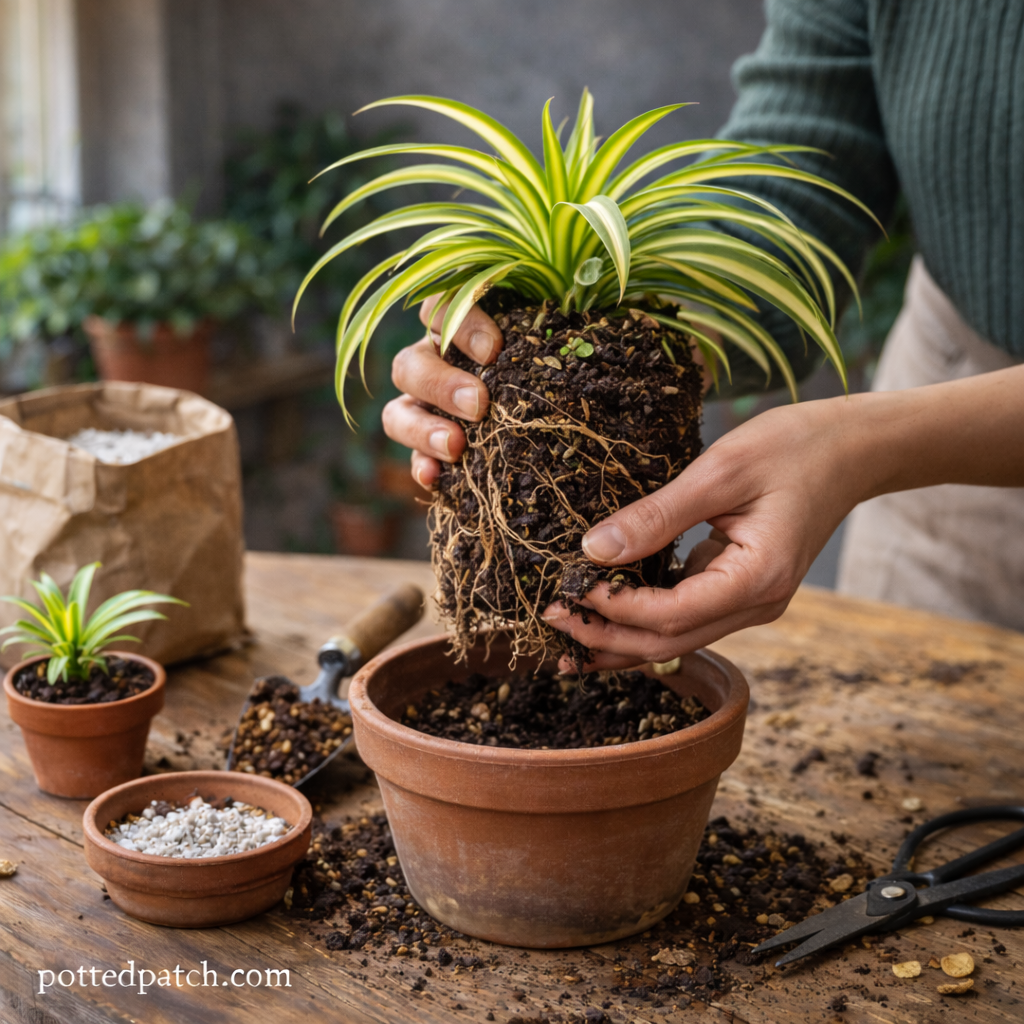
If roots are tightly circling:
- Gently tease them apart with your fingers.
- Trim any brown or mushy roots with clean scissors.
Healthy roots should be firm and light in color.
Step 4: Add Fresh Soil to New Pot
Place a layer of fresh soil at the bottom of the new container.
Set the plant so the top of the root ball sits about 1 inch below the rim.
Step 5: Fill and Firm Gently
Add soil around the sides.
Lightly press down — don’t pack tightly. Roots need airflow.
Step 6: Water Thoroughly
Water until excess drains out the bottom.
Discard any water sitting in the saucer.
Aftercare: What to Expect
After repotting, your dracaena may experience mild stress for 1–2 weeks.
You may notice:
- Slight drooping
- Slowed growth
- Minor leaf adjustment
Keep conditions stable:
- Bright, indirect light
- No fertilizer for 3–4 weeks
- Moderate watering
Avoid moving the plant frequently during this recovery period.
Common Repotting Mistakes to Avoid
Here are the most common errors:
- Choosing a pot too large
- Using heavy, water-retentive soil
- Repotting during winter dormancy
- Overwatering immediately after repotting
- Fertilizing too soon
Repotting is meant to refresh the plant — not shock it.
Can You Repot a Large Dracaena?
For tall or mature dracaenas, full repotting may be difficult.
In that case, try top-dressing:
- Remove the top 1–2 inches of old soil.
- Replace with fresh, well-draining mix.
This refreshes nutrients without disturbing roots too much.
Final Thoughts
Repotting a dracaena isn’t complicated — but timing and technique matter.
Only repot when needed, choose a slightly larger pot with drainage, use well-draining soil, and allow time for recovery.
With proper repotting, your dracaena will continue growing strong, healthy, and vibrant indoors.