Root rot is one of the most serious problems a Monstera can face—but it’s also fixable if you act quickly. Because Monsteras store moisture in thick roots and stems, excess water and poor drainage can silently damage the root system long before leaves show obvious symptoms.
This guide explains how to identify root rot on a Monstera, how to fix it step by step, and how to prevent it from happening again.
What Is Root Rot in Monstera Plants?
Root rot occurs when roots sit in overly wet soil for too long, depriving them of oxygen. Instead of absorbing water and nutrients, affected roots begin to decay.
In Monsteras, root rot is most often caused by:
- Overwatering
- Poorly draining soil
- Pots without drainage holes
- Compacted or old soil
- Low light combined with frequent watering
Once rot starts, it can spread quickly if not addressed.
Early Signs of Root Rot on Monstera
Catching root rot early dramatically increases the chance of saving the plant.
Above-Soil Warning Signs
- Yellowing leaves, especially lower ones
- Limp or drooping leaves that don’t perk up after watering
- Slow or stalled growth
- Leaves turning brown at the edges or tips
Below-Soil Warning Signs
- Soil that stays wet for many days
- A sour or rotten smell from the pot
- Mushy, dark roots visible through drainage holes
If multiple signs appear at once, root rot is likely already present.
Step-by-Step: How to Fix Root Rot on Monstera
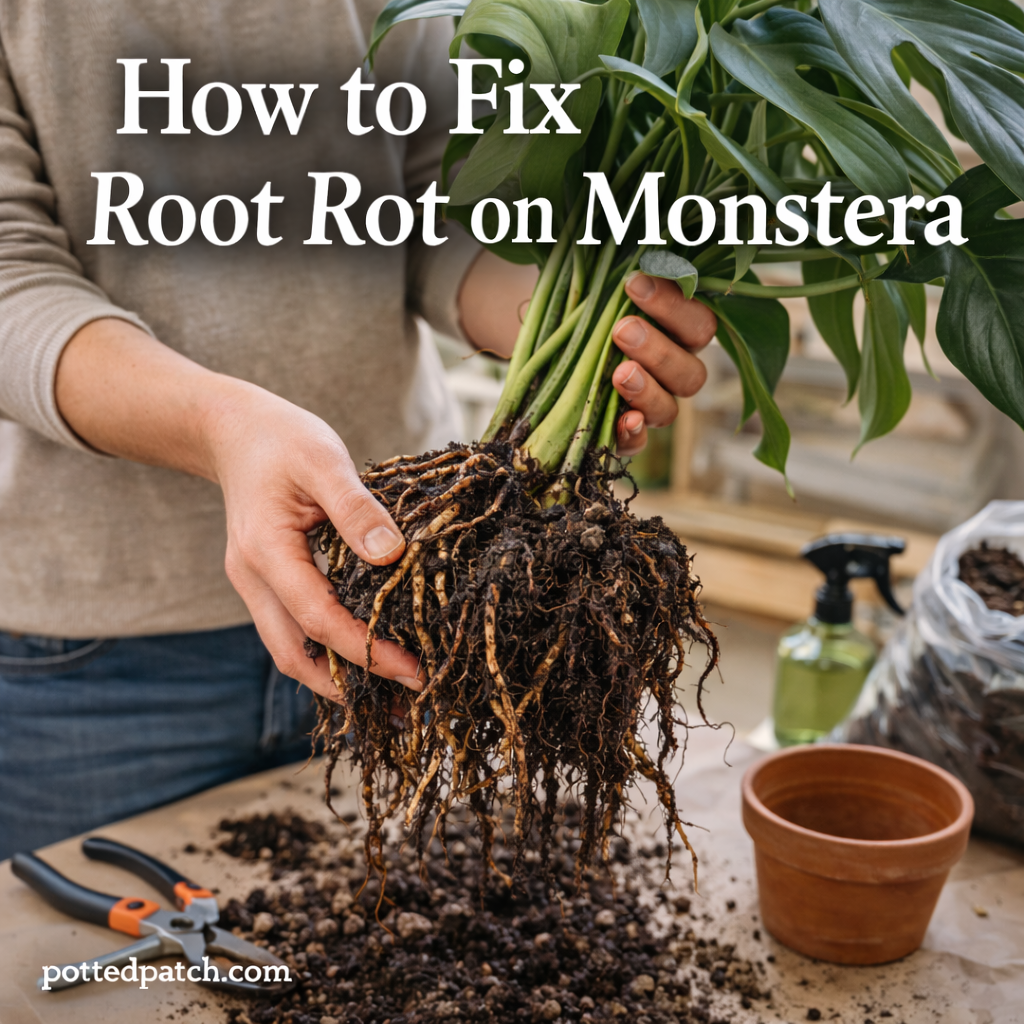
Step 1: Remove the Plant From Its Pot
Gently slide the Monstera out of its container. If the plant is large, lay it on its side to avoid snapping stems.
Shake off as much soil as possible to expose the root system.
Step 2: Inspect the Roots Carefully
Healthy Monstera roots are:
- Firm
- Light tan or white
- Slightly flexible
Rotten roots will be:
- Dark brown or black
- Mushy or slimy
- Foul-smelling
- Easily pulled apart
You’ll need to remove all damaged roots.
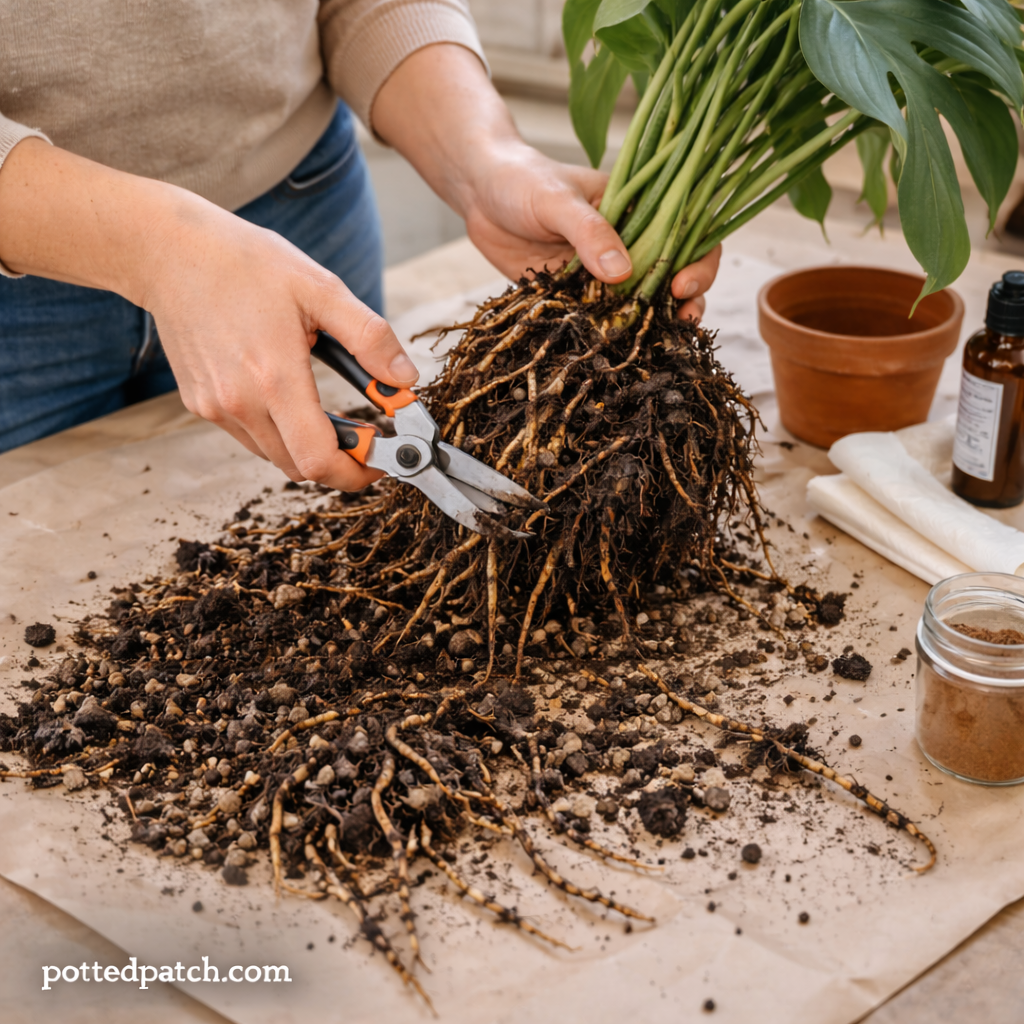
Step 3: Trim Away All Rotten Roots
Using clean, sharp scissors or pruning shears:
- Cut away every mushy or dark root
- Trim back to firm, healthy tissue
- Disinfect tools between cuts if rot is widespread
It’s better to remove too much than leave rot behind.
Step 4: Let the Roots Dry Briefly
Before repotting:
- Allow the trimmed roots to air dry for 1–2 hours
- This helps wounds callus and reduces reinfection risk
Avoid leaving roots exposed for an entire day.
Step 5: Repot in Fresh, Well-Draining Soil
Root rot will return if soil conditions don’t change.
Use a soil mix that is:
- Fast-draining
- Light and airy
- Resistant to compaction
A good Monstera soil blend includes potting soil mixed with perlite, orchid bark, or coarse material.
Always choose a pot with drainage holes.
Step 6: Adjust Watering Immediately
After repotting:
- Wait several days before watering
- Water lightly the first time
- Allow soil to dry partially between waterings
Monsteras prefer slightly moist soil—but never soggy.
What If Most of the Roots Are Gone?
If root rot is severe, recovery is still possible.
Option 1: Propagate Healthy Stems
If the root system is beyond saving:
- Cut healthy stems with nodes
- Root them in water or fresh soil
- Start over with a healthier plant
Monsteras propagate easily and often recover faster this way.
Option 2: Downsize the Pot
If few roots remain:
- Use a smaller pot
- Avoid excess soil volume
- Reduce watering frequency
Too much empty soil holds moisture and slows recovery.
Common Mistakes When Treating Root Rot
Avoid these errors during recovery:
- Reusing old soil
- Repotting into the same wet container
- Watering immediately after trimming roots
- Keeping the plant in low light
- Using moisture-retaining soil mixes
Root rot treatment requires environmental changes, not just trimming.
How to Prevent Root Rot in the Future
Once your Monstera recovers, prevention is key.
Best Prevention Practices
- Always use pots with drainage holes
- Water only when the top soil begins to dry
- Use chunky, fast-draining soil
- Empty saucers after watering
- Increase light to match watering habits
Healthy roots rely on both oxygen and moisture balance.
Signs Your Monstera Is Recovering
Recovery takes time, but positive signs include:
- New leaf growth
- Firmer stems
- Improved leaf color
- Soil drying at a predictable rate
Older damaged leaves may not recover, but new growth indicates success.
Final Thoughts
Root rot on a Monstera can look intimidating, but it’s often fixable with quick action and better soil and watering habits. The key is removing all damaged roots, improving drainage, and letting the plant reset in a healthier environment.
With the right care, Monsteras are resilient—and many bounce back stronger than before.