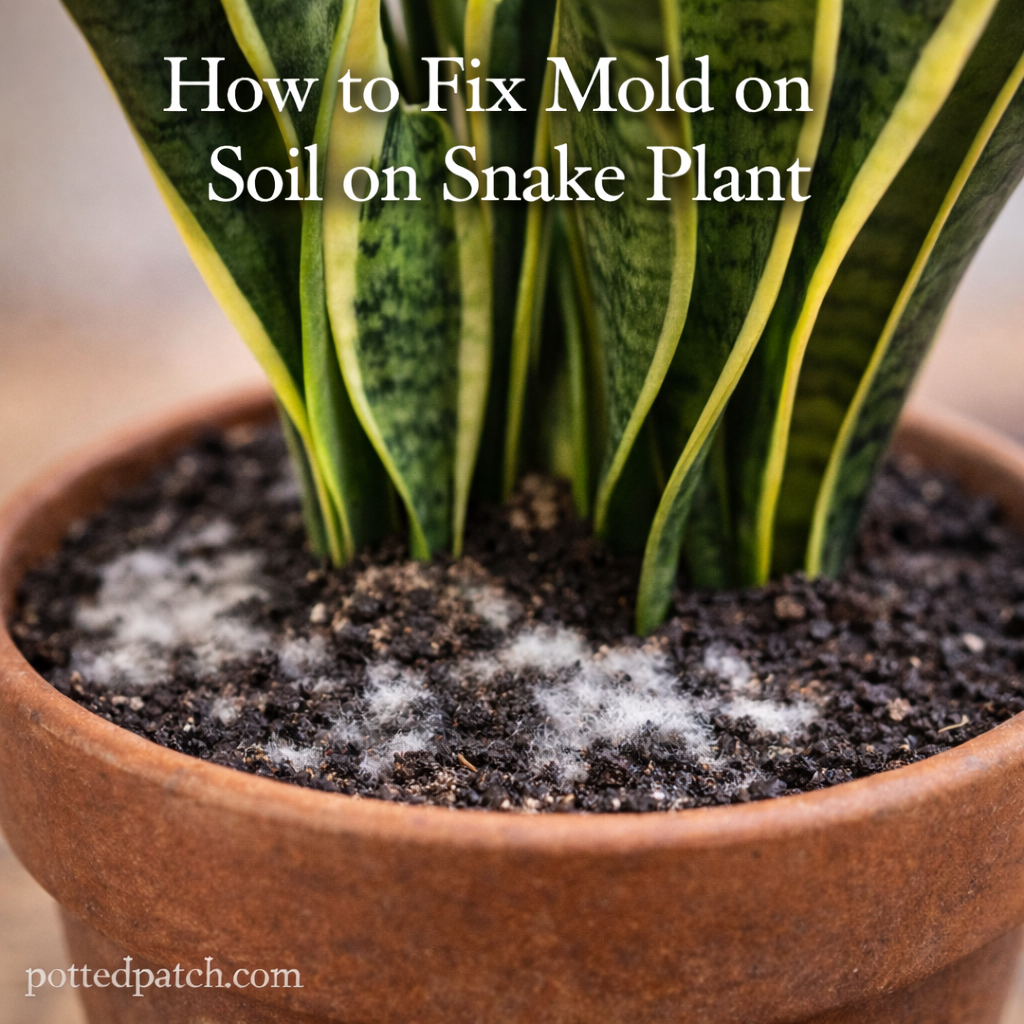
White or gray mold on your snake plant’s soil can look alarming. The good news? In most cases, it’s easy to fix.
Mold on soil is usually a sign of excess moisture, poor airflow, or slow-draining soil — not a dying plant. Once you correct the environment, the mold typically disappears and your snake plant continues thriving.
Here’s exactly how to fix mold on snake plant soil step by step.
What Causes Mold on Snake Plant Soil?
Before treating it, understand why it’s happening.
Common causes include:
- Overwatering
- Poor drainage
- Compact or organic-heavy soil
- Low airflow
- High humidity
Snake plants prefer dry conditions. When soil stays damp too long, surface fungus develops.
Step-by-Step: How to Fix Mold on Snake Plant Soil
Follow these steps to eliminate mold and prevent it from returning.
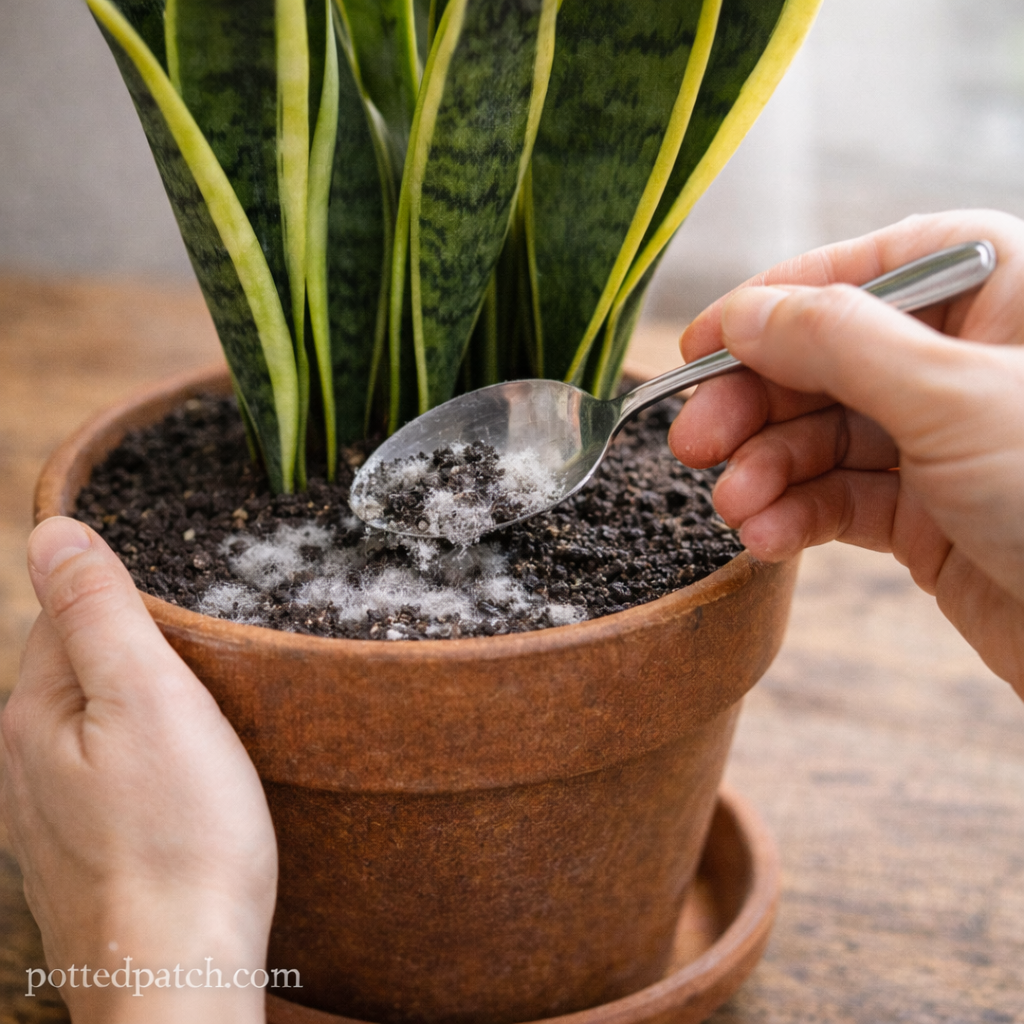
Step 1: Remove the Moldy Top Layer
Use a spoon or small trowel to remove the top 1–2 inches of moldy soil.
- Discard it immediately
- Do not reuse or compost it
- Avoid disturbing deeper roots
Replace the removed soil with fresh, dry potting mix.
This solves mild cases quickly.
Step 2: Let the Soil Dry Completely
After removing the mold, allow the soil to dry thoroughly.
Do not water until:
- The top 2–3 inches feel completely dry
- The pot feels lighter when lifted
Snake plants tolerate dry soil far better than soggy conditions.
Step 3: Improve Drainage
If mold returns or soil feels dense, drainage likely needs improvement.
Repot using:
- Cactus or succulent mix
- Added perlite or pumice
- A pot with drainage holes
Avoid oversized pots that hold excess moisture.
Step 4: Increase Airflow
Mold thrives in stagnant air.
Improve circulation by:
- Spacing plants apart
- Opening windows periodically
- Using a small fan in low-airflow rooms
Even light airflow significantly reduces mold recurrence.
Step 5: Adjust Your Watering Routine
Going forward:
- Water only when soil is fully dry
- Avoid watering on a fixed schedule
- Always empty saucers after watering
A good rule: If unsure, wait a few more days before watering.
Optional: Natural Mold Treatments
If you want extra protection:
- Lightly sprinkle cinnamon on the soil surface
- Use a diluted hydrogen peroxide solution (1:4 with water) once
- Avoid heavy chemical fungicides unless mold persists
Environmental correction is more important than treatment products.
When to Fully Repot
Consider a complete repot if:
- Mold keeps returning
- The soil smells sour
- Leaves turn soft or yellow
- Roots appear dark or mushy
Inspect roots carefully. Trim any damaged sections before replanting in fresh soil.
Is Mold Dangerous to Snake Plants?
Surface mold is usually harmless on its own.
However, it signals moisture imbalance. If ignored, wet soil can lead to:
- Root rot
- Soft, collapsing leaves
- Foul odors
Treat the cause early to avoid deeper issues.
How to Prevent Mold in the Future
Prevention is simple:
- Use fast-draining soil
- Choose pots with drainage holes
- Allow full drying between waterings
- Maintain moderate airflow
- Avoid excessive humidity
Snake plants thrive in slightly dry conditions.
Final Thoughts
Fixing mold on snake plant soil is straightforward once you address moisture and airflow.
Remove the moldy layer, let the soil dry, improve drainage, and adjust watering habits. With those corrections, your snake plant should remain healthy and mold-free.
When in doubt, remember: Snake plants prefer underwatering to overwatering.