Boston ferns are known for their soft, arching fronds and lush green appearance. While light and watering are important, soil is often the hidden factor behind healthy growth.
Choosing the best soil for a Boston fern ensures proper drainage, steady moisture, and strong root development. If your fern looks wilted, yellow, or weak despite regular care, the potting mix may be the issue.
In this guide, you’ll learn exactly what kind of soil Boston ferns prefer and how to create the ideal mix at home.
Understanding Boston Fern Soil Needs
Boston ferns (Nephrolepis exaltata) naturally grow in humid forests where the soil is:
- Rich in organic matter
- Light and airy
- Moist but well-draining
- Slightly acidic
This tells us something important: Boston ferns do not thrive in dense, compacted soil.
Their roots need oxygen as much as they need moisture.
The Ideal Soil Texture
The best soil for a Boston fern should feel:
- Soft and fluffy
- Slightly moist but not soggy
- Easy to squeeze but quick to crumble
If water pools on top of the soil or drains extremely slowly, the mix is too heavy.
If water runs straight through and the soil dries within a day, it’s too loose.
The goal is balanced moisture retention with steady drainage.
Recommended Soil Mix for Boston Ferns
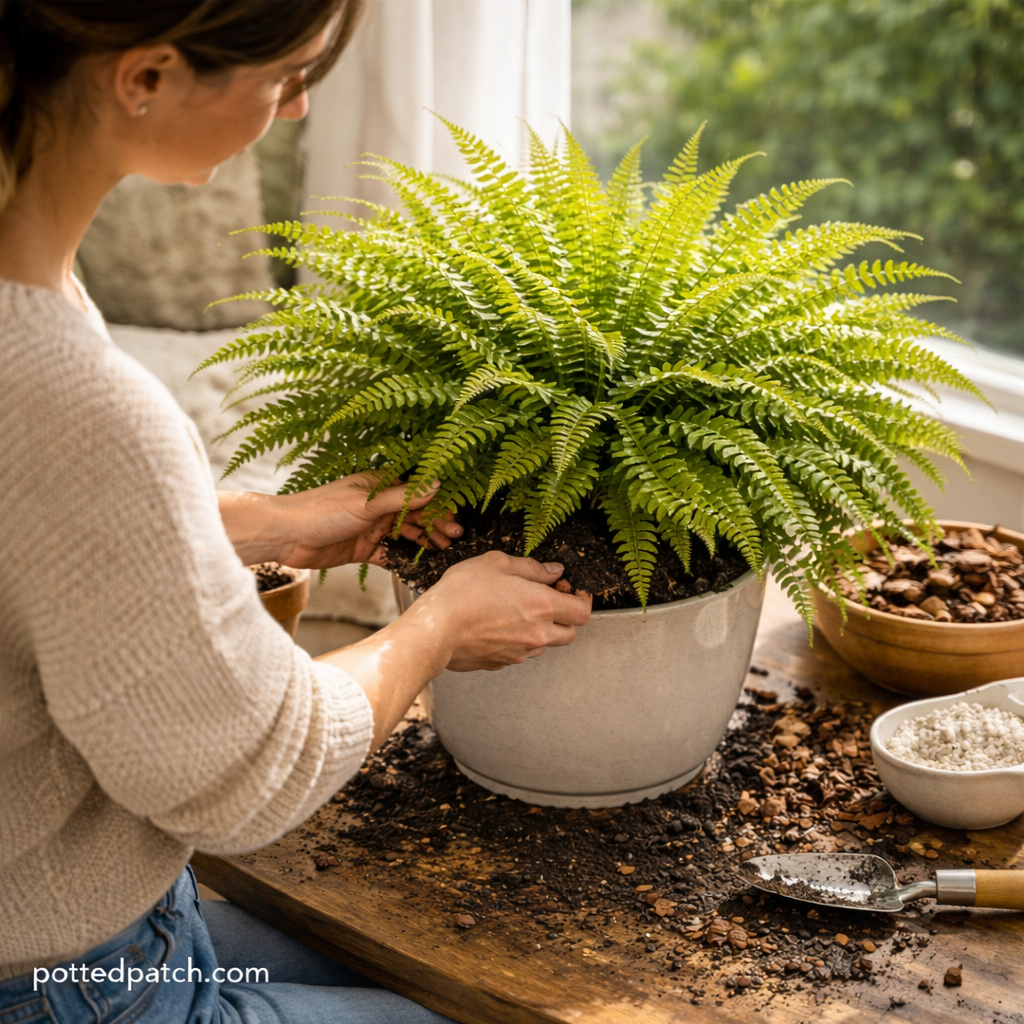
You can use a high-quality indoor potting mix, but improving it slightly produces better results.
Simple DIY Boston Fern Soil Mix
Combine:
- 2 parts peat-based potting soil
- 1 part perlite
- 1 part pine bark fines or orchid bark
This blend provides:
- Moisture retention (peat)
- Drainage and aeration (perlite)
- Structure and airflow (bark)
Mix thoroughly before potting to distribute materials evenly.
Can You Use Regular Potting Soil?
Standard indoor potting soil can work, but it’s often too dense on its own.
If using regular potting mix:
- Add extra perlite to improve drainage.
- Loosen the soil before planting.
- Ensure the container has drainage holes.
Avoid garden soil, which is too heavy and can compact easily.
Soil pH for Boston Ferns
Boston ferns prefer slightly acidic soil with a pH between:
6.0 and 6.5
Most indoor potting mixes already fall within this range.
If growth appears weak despite good care, you may test soil pH using an inexpensive meter. However, in most home environments, pH issues are rare.
Signs the Soil Is Wrong
Your Boston fern will show clear signs if the soil isn’t suitable.
Soil Too Dense
- Yellowing fronds
- Root rot smell
- Soggy surface
- Slow drainage
Soil Too Fast-Draining
- Constant wilting
- Dry soil within 24 hours
- Crispy leaf edges
Adjusting the mix early can prevent long-term damage.
Repotting Tips for Healthy Roots
Boston ferns benefit from repotting every 1–2 years.
When repotting:
- Choose a pot 1–2 inches larger than the current one
- Use fresh, well-aerated soil
- Gently loosen root-bound areas
- Avoid packing soil too tightly
After repotting, water thoroughly and allow excess water to drain fully.
Drainage Is Just as Important as Soil
Even the best soil won’t help if water has nowhere to go.
Always use:
- Pots with drainage holes
- A saucer to catch excess water
- A breathable container (terracotta can help prevent soggy soil)
Never let the plant sit in standing water for extended periods.
Final Thoughts
The best soil for a Boston fern is rich, airy, and moisture-retentive without being soggy.
A peat-based mix combined with perlite and bark creates the perfect balance for healthy roots and lush fronds.
If your fern struggles despite proper light and watering, check the soil structure. Improving aeration and drainage often brings dramatic improvement.
Healthy roots mean fuller growth, deeper green color, and a Boston fern that thrives indoors year-round.