Ferns are lush, elegant houseplants that thrive when their roots have room to breathe. But even the healthiest fern will eventually outgrow its pot.
Repotting at the right time — and doing it correctly — can prevent drooping, yellowing, and stalled growth. In this guide, you’ll learn exactly when to repot a fern, how to do it safely, and how to minimize stress during the process.
How Often Should You Repot a Fern?
Most indoor ferns need repotting every 1–2 years.
However, timing depends more on root condition than calendar dates. Some fast-growing varieties may need attention sooner, while slower growers can stay put longer.
Signs It’s Time to Repot Your Fern
Watch for these indicators:
- Roots growing out of drainage holes
- Water running straight through the pot
- Soil drying out much faster than usual
- Slowed or stalled growth
- Yellowing or thinning fronds
- Roots circling tightly inside the pot
If you gently slide the plant out and see dense, compacted roots with little visible soil, it’s time.
Best Time of Year to Repot a Fern
The ideal time is early spring.
Repotting at the start of the growing season allows the fern to recover quickly and establish new roots.
Avoid repotting during:
- Late fall
- Winter dormancy
- Periods of extreme heat
If the plant is severely rootbound or suffering from poor soil, repot immediately — regardless of season.
Choosing the Right Pot
When upgrading pots:
- Select a container 1–2 inches wider than the current one
- Always use a pot with drainage holes
- Avoid oversized pots (too much soil can retain excess moisture)
Ferns prefer slightly snug roots, so only size up gradually.
The Best Soil for Repotting Ferns
Ferns need soil that is:
- Light and airy
- Rich in organic matter
- Slightly acidic
- Moisture-retentive but well-draining
A reliable mix includes:
- 2 parts indoor potting mix
- 1 part perlite
- 1 part compost or orchid bark
Avoid heavy garden soil or cactus mixes.
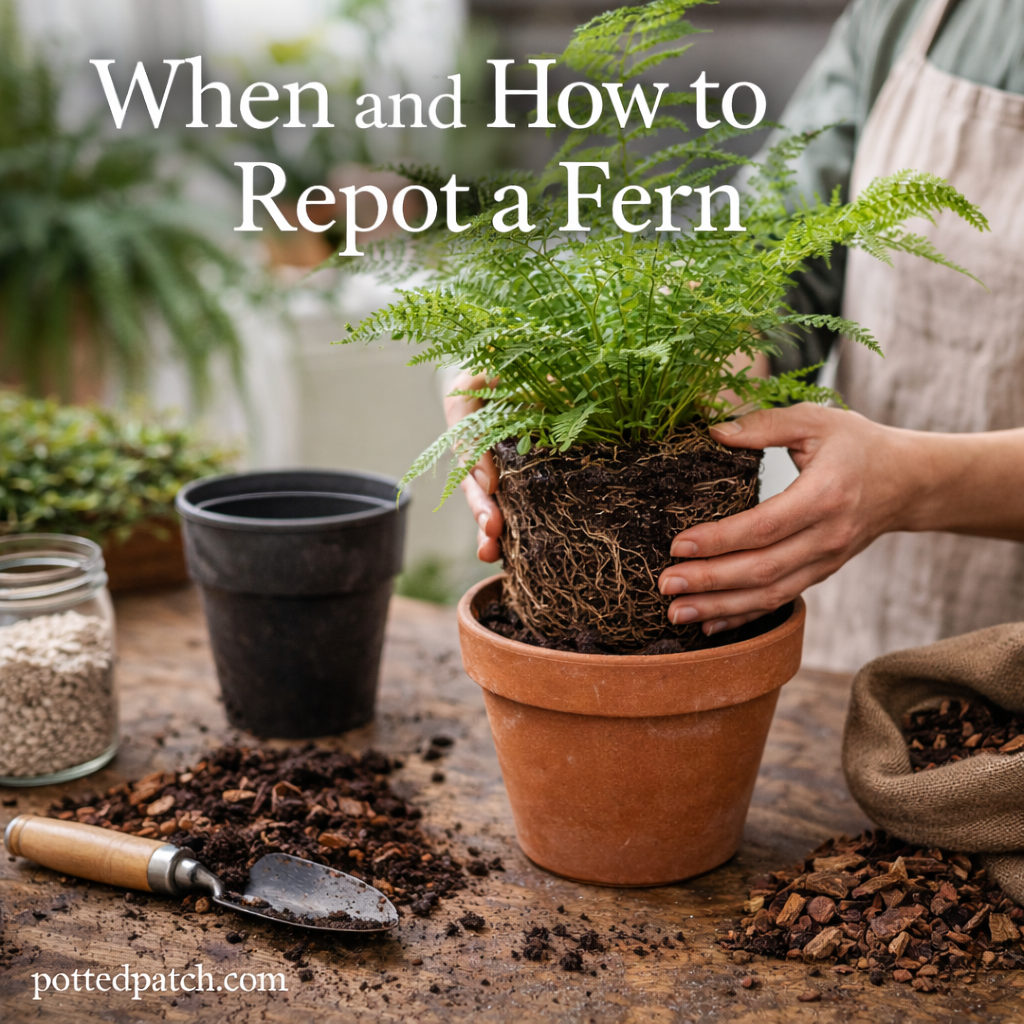
Step-by-Step: How to Repot a Fern
Follow these steps for minimal stress:
1. Water the Fern First
Water the plant lightly a few hours before repotting. This helps reduce root shock and makes removal easier.
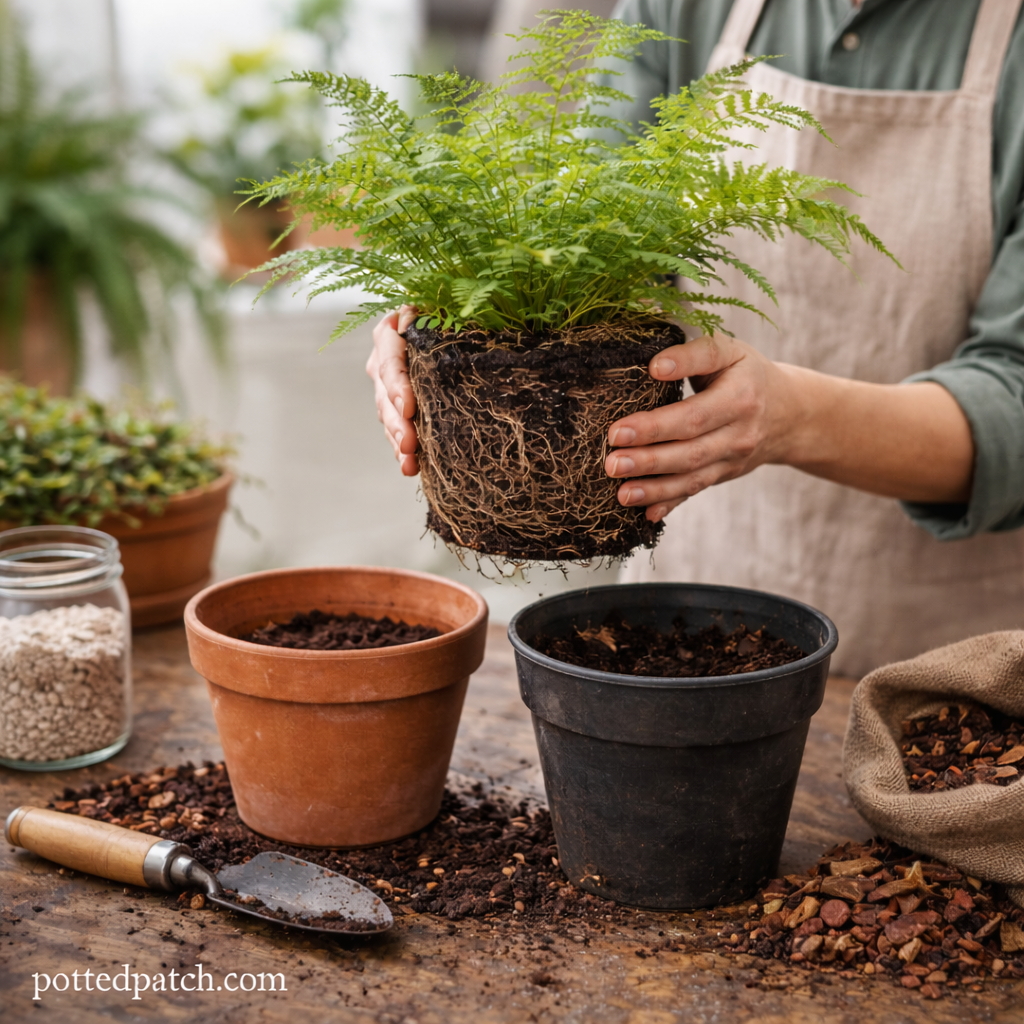
2. Gently Remove the Plant
Tip the pot sideways and slide the root ball out carefully. Support the base of the plant — never pull by the fronds.
3. Loosen the Roots
If roots are tightly packed, gently tease them apart with your fingers. Trim any mushy or black roots with clean scissors.
4. Prepare the New Pot
Add a small layer of fresh soil at the bottom.
5. Position the Fern
Place the fern at the same depth it was growing before. Do not bury the crown.
6. Fill Around the Roots
Add fresh soil around the sides, lightly pressing to remove large air pockets — but don’t compact tightly.
7. Water Thoroughly
Water until it drains out the bottom. Empty any excess water from the saucer.
Aftercare: Helping Your Fern Recover
Repotting can temporarily stress your plant. To help it bounce back:
- Keep it in bright, indirect light
- Avoid direct sunlight
- Maintain consistent moisture
- Skip fertilizer for 4–6 weeks
- Increase humidity if possible
Some minor drooping is normal for a few days.
Common Repotting Mistakes to Avoid
Avoid these common issues:
- Using a pot that’s too large
- Packing soil too tightly
- Damaging the crown
- Repotting during dormancy
- Fertilizing immediately after repotting
Patience is key — healthy roots take time to reestablish.
Can You Divide a Fern While Repotting?
Yes — many ferns can be divided during repotting.
If the plant has multiple distinct root clusters, you can gently separate them and plant each section in its own container.
Make sure each division has:
- Healthy roots
- Several fronds
- Its own intact crown
Division is best done in spring.
Final Thoughts
Repotting a fern isn’t complicated — it just requires timing and care. Most indoor ferns benefit from fresh soil and a slightly larger container every couple of years.
If you notice roots crowding the pot or soil drying too quickly, don’t wait. A simple repot can restore growth, improve leaf health, and keep your fern thriving for years to come.