White, fuzzy mold on your peace lily’s soil can look alarming — but it’s usually a surface issue caused by excess moisture and poor airflow.
The key to fixing mold isn’t just removing it. You need to correct the conditions that allowed it to grow.
Here’s a simple, step-by-step guide to safely eliminate mold and prevent it from coming back.
Why Mold Appears on Peace Lily Soil
Mold thrives in:
- Consistently damp soil
- Low airflow
- Poor drainage
- Dark, humid environments
Peace lilies prefer moist soil — but when soil stays wet for too long, fungal spores activate and spread across the surface.
The mold itself is often harmless, but it signals an imbalance in care.
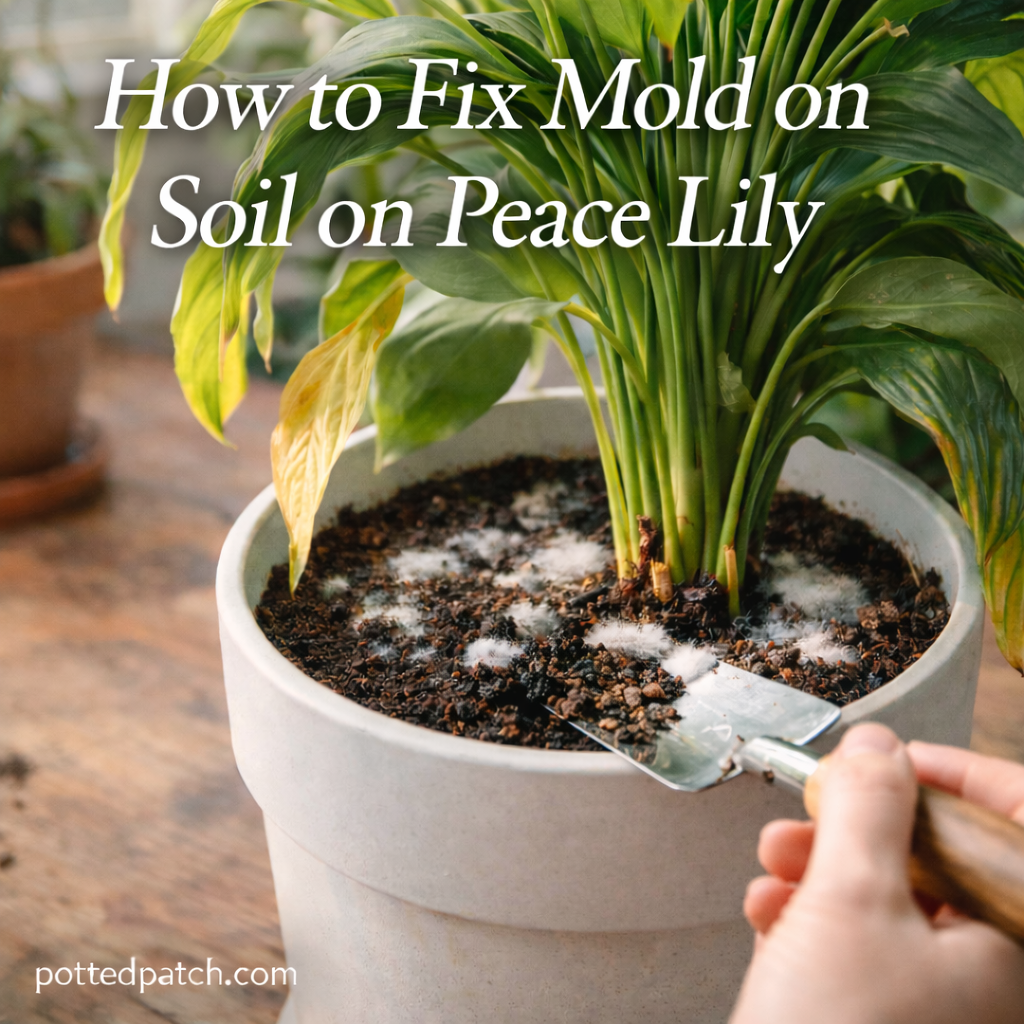
Step 1: Remove the Moldy Top Layer
Start by removing the visible mold.
- Use a spoon or small trowel.
- Scoop out the top 1–2 inches of affected soil.
- Discard it immediately — do not reuse it.
Avoid stirring the mold into deeper soil layers.
Replace with fresh, dry potting mix.
Step 2: Let the Soil Dry Properly
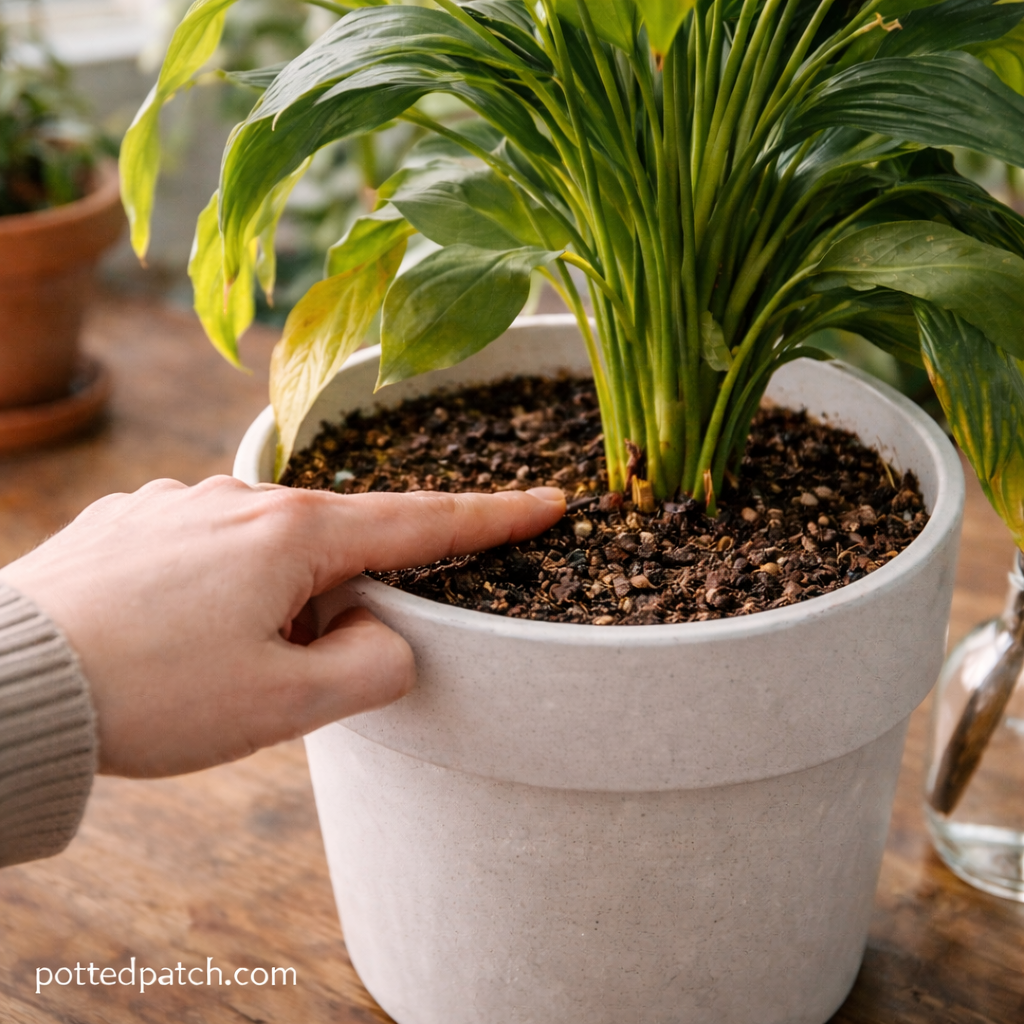
Before watering again:
- Allow the top layer of soil to dry completely.
- Check moisture 1–2 inches below the surface.
- Do not water on a strict schedule.
Peace lilies need moisture — not saturation.
Step 3: Improve Drainage
Drainage problems often cause repeat mold growth.
Check for:
- Pots without drainage holes
- Decorative outer pots trapping water
- Compacted, heavy soil
If needed:
- Switch to a pot with drainage holes.
- Add perlite to improve airflow.
- Repot in fresh, well-draining soil.
Water must exit freely from the bottom.
Step 4: Increase Light and Airflow
Mold grows faster in dark, stagnant air.
Move your peace lily to:
- Bright, indirect light
- A space with better air circulation
Avoid cold, damp corners.
Even a small increase in airflow can dramatically reduce fungal growth.
Optional Natural Treatments
If mold keeps returning, you can try gentle treatments.
Cinnamon
Sprinkle a thin layer over the soil surface.
Cinnamon has natural antifungal properties.
Diluted Hydrogen Peroxide
Mix 1 part 3% hydrogen peroxide with 4 parts water.
Lightly water the soil once to kill fungal spores.
Do not over-saturate.
When to Repot Completely
Full repotting may be necessary if:
- Mold returns quickly
- Soil smells sour
- Roots appear black or mushy
- The plant shows yellowing or soft stems
Repot using:
- Fresh indoor potting mix
- A clean container with drainage holes
Inspect roots while repotting to rule out root rot.
Preventing Mold from Returning
Long-term prevention is simple:
- Let the top 1–2 inches of soil dry between waterings
- Ensure proper drainage
- Avoid letting the plant sit in water
- Provide bright, indirect light
- Increase airflow in the room
Healthy soil stays breathable — not soggy.
Is Soil Mold Dangerous?
Surface mold is rarely harmful to humans or the plant in small amounts.
However, if you are sensitive to mold or notice strong odors, remove it promptly and improve ventilation.
The real danger isn’t the mold — it’s the excess moisture behind it.
Final Thoughts
Mold on peace lily soil is usually a symptom, not the core problem.
Fix the environment, adjust watering habits, and improve drainage.
Once soil conditions are balanced, mold rarely returns.
Healthy peace lilies thrive in moist — but well-aerated — soil.