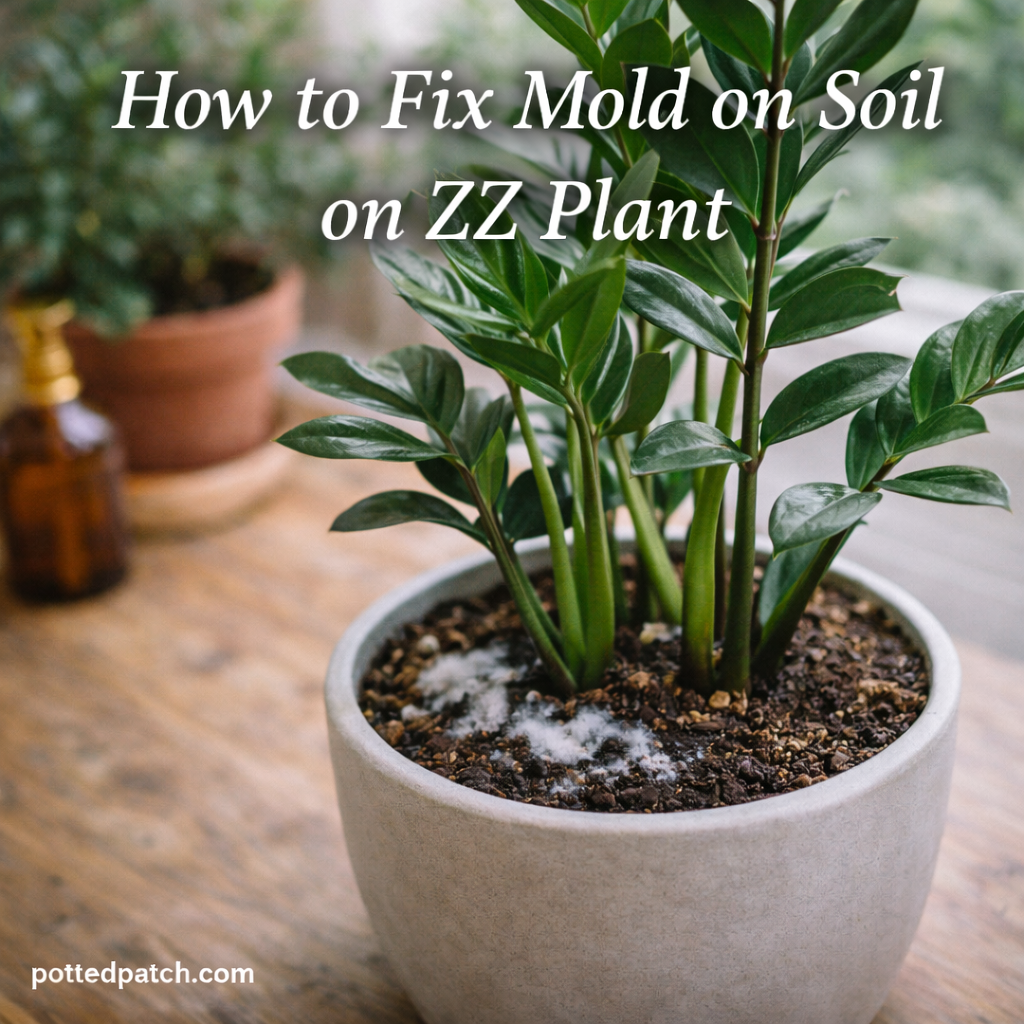
Seeing white or gray fuzzy mold on your ZZ plant’s soil can be alarming. The good news? In most cases, it’s easy to fix.
Mold on soil usually means the environment is staying too damp. While the fungus itself often isn’t directly harming the plant, the moisture conditions behind it can lead to bigger problems like root rot.
Here’s exactly how to fix mold on ZZ plant soil — and prevent it from coming back.
Why Mold Forms on ZZ Plant Soil
Before fixing the problem, it helps to understand why it happens.
ZZ plants (Zamioculcas zamiifolia) store water in thick rhizomes and prefer dry conditions between waterings. When soil remains consistently moist, fungal spores can grow on the organic material in the mix.
Common causes include:
- Overwatering
- Poor drainage
- Compacted or old soil
- Low airflow
- High indoor humidity combined with wet soil
If the soil stays damp for too long, mold appears.
Step 1: Stop Watering Immediately
The first fix is simple — let the soil dry out completely.
ZZ plants tolerate drought very well. They do not tolerate constant moisture.
Wait until the soil is fully dry 2–3 inches down before watering again.
In many homes, this means watering only every 2–4 weeks.
Step 2: Remove the Moldy Top Layer
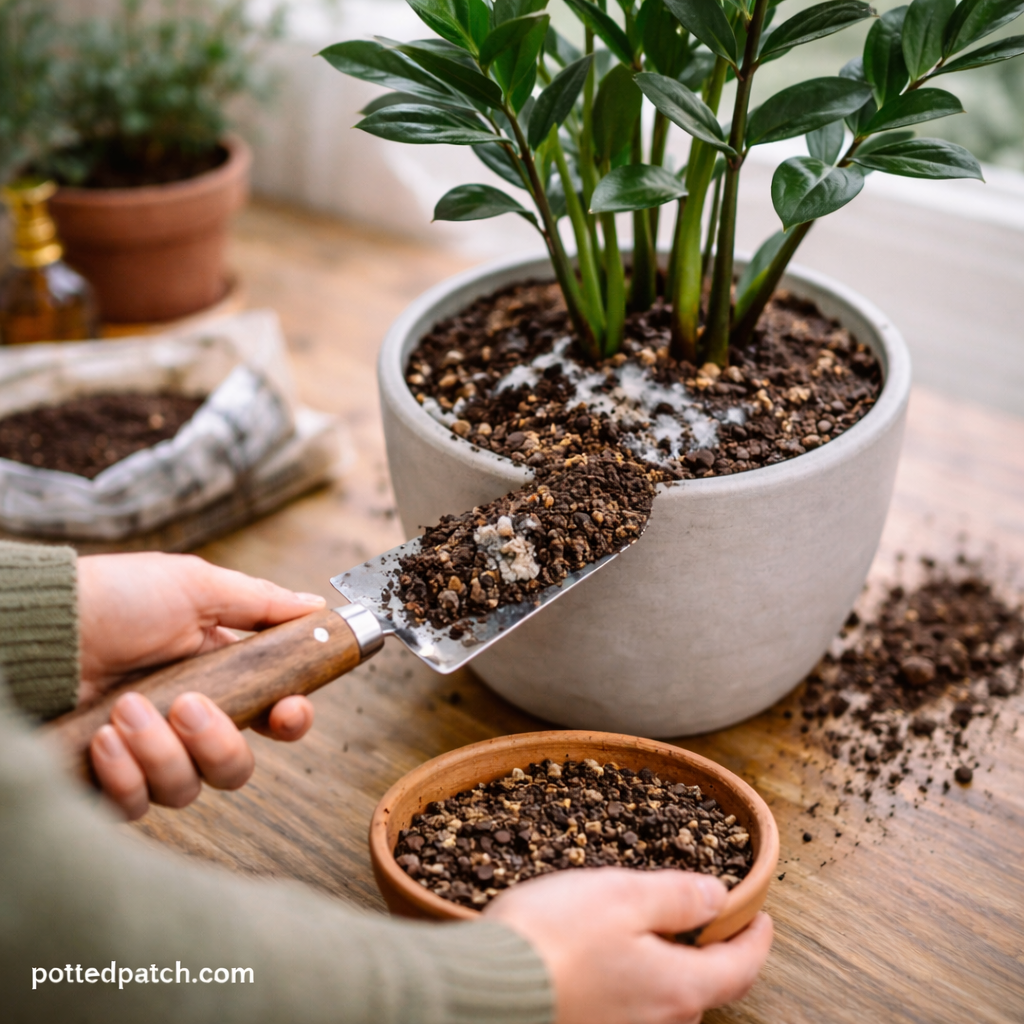
Surface mold is usually limited to the top inch of soil.
To remove it:
- Use a spoon or small trowel.
- Carefully scoop out the top 1–2 inches of affected soil.
- Discard it completely.
- Replace with fresh, dry potting mix.
Avoid mixing moldy soil back into the pot.
This step often solves the issue if caught early.
Step 3: Improve Drainage
If mold keeps returning, drainage is likely the real issue.
Check the pot:
- Does it have drainage holes?
- Is water pooling in a decorative outer pot?
- Is the soil dense and heavy?
ZZ plants need fast-draining soil.
Ideal Soil Mix
- 2 parts indoor potting mix
- 1 part perlite
- 1 part coarse sand or orchid bark
This allows excess moisture to escape quickly and keeps roots healthy.
If your current mix feels heavy or soggy days after watering, repot.
Step 4: Increase Airflow
Still, stagnant air slows soil drying.
Improve airflow by:
- Moving the plant to a brighter area
- Avoiding cramped corners
- Using a small fan nearby if needed
Better air movement helps prevent mold from forming again.
Step 5: Adjust Your Watering Habit
ZZ plants prefer a “soak and dry” approach.
Instead of watering on a schedule:
- Check the soil first
- Water thoroughly
- Let it dry out completely before watering again
When in doubt, wait an extra few days.
Underwatering is far safer than overwatering for ZZ plants.
When to Fully Repot
If you notice:
- A strong musty smell
- Yellowing leaves
- Mushy stems
- Persistent mold
You may need to fully repot.
Steps:
- Remove the plant from the pot.
- Gently shake off old soil.
- Inspect the roots.
- Trim any black or mushy roots with clean scissors.
- Replant in fresh, well-draining soil.
Healthy ZZ roots are firm and light in color.
Can You Use Natural Remedies?
Some gardeners sprinkle cinnamon on the soil surface because it has mild antifungal properties.
While it can help discourage surface fungus, it does not solve drainage or overwatering problems.
Fixing moisture levels is far more important than surface treatments.
Preventing Mold in the Future
To keep your ZZ plant mold-free:
- Always use a pot with drainage holes
- Let soil dry fully between waterings
- Use a fast-draining mix
- Avoid letting water sit in saucers
- Repot every 1–2 years
Once watering is corrected, mold rarely returns.
Final Thoughts
Fixing mold on ZZ plant soil isn’t about killing fungus — it’s about correcting moisture balance.
ZZ plants are extremely resilient. Once you allow the soil to dry properly and improve drainage, the problem typically disappears.
Remember:
ZZ plants thrive on neglect more than attention.
Let them dry out, and they’ll reward you with healthy, glossy leaves.